In our previous article we showed you how to install WordPress on a local server. Now we’ll move one step forward. Let’s say you just bought your new hosting server which uses cPanel and you want to install WordPress on it. How will you do that? There are multiple ways to do this, all of them are pretty easy and can be done within a few steps. In this article we’ll show you how to do it with QuickInstall, which is an application inside cPanel that helps you install software and services easily.

Install WordPress Using QuickInstall
To be able to follow along with this tutorial, make sure that you’ve got your cPanel information from your hosting provider and you have access to your cPanel account. If you have all these, then go ahead and login to your cPanel account and scroll down until you find a section called Softwares/Services. If you found it, look for an application called QuickInstall.
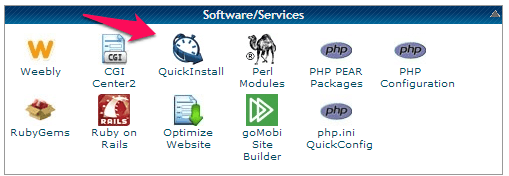
Once you’ve clicked on the application, you will be navigated to the QuickInstall dashboard. Here you can install many software or services, but in this article we’ll learn how to install WordPress, so we won’t bother with any of the other software that are listed there. So, go ahead and select WordPress from the left side under Blog Software.

At this point you’ll see a description about what WordPress is, the current version that will be installed on your host, the install size and the official WordPress website. Click Continue.
Now you’ll have to select a domain on which to install WordPress, or you can install it on a subdirectory using the text field after the selected domain name. Then you type in your email address, your Blog’s Title, a username and your First and Last name in the fields below and press Install. It shouldn’t take too long till it is finished and installed. After it is installed, a new section will appear that contains your WordPress login and website information, you’ll also get an email notification that includes your blog’s URL, your username and password.
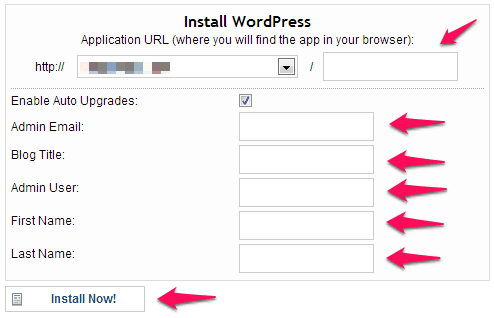
Depending on your hosting provider, there might be some plugins that are automatically installed to your WordPress. In most cases, it’s a caching plugin to help your websites load speed.
So we have installed WordPress, but we’re still not done yet.
Changing the Auto-Generated Password
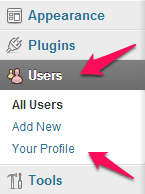
The most important step is to change your password after installing WordPress! To do this, login to your blog and go to your profile. This can be done multiple ways. You can click on the bar at the top of the site, and click on your username in the top right. Or usually when you login you’ll be redirected to the Admin Dashboard, here you go to Users -> Your Profile.
When you’re on your profile settings page, you need to look for the About yourself section. There you’ll find a Biographical Info box, and the new password section. Enter your new password twice as asked; be sure to look at the strength indicator as well. Stronger the password is the better!
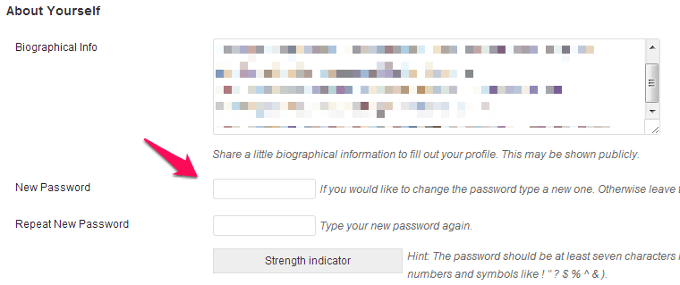
And at this point … we’re done! You have your newly installed WordPress using cPanel on your hosting service. Don’t forget to checkout our guide on how to blog. If you have any questions or suggestion regarding this topic, don’t hesitate to leave a comment below! We’ll try to solve your queries or doubts.

Leave a comment
Have something to say about this article? Add your comment and start the discussion.