Considering the huge demand by our beloved readers for modifications in Mystique 3.0, here we are publishing Most Wanted Mystique 3.0+ Modifications, Hacks. Customize Mystique theme as per your choice.
Code Snippets to Modify Mystique Theme:
Note: To modify Mystique WordPress Theme you have to add the following code, Under Appearance -> Mystique -> CSS or in the Advanced tab. We recommend that always install Mystique child theme so you will not lose any modifications when you will update the theme.
Important thing: Mystique theme developer stopped working on this theme so we advise you to use Genesis framework.
1. Adjust the position of Site Title Logo:
#site-title {
padding: 25px 0 2px 0;
}
Where 25px is the space above site title and the 2px is space below site title or site logo.
2. Change Site title color:
#logo a {
color: #E0E0E0;
}
Change the value of E0E0E0 if you want another color.
If you want to make site title as per our choice then add following code:
#logo a {
color: #E0E0E0;
display: block;
font-variant: small-caps;
text-decoration: none;
text-transform: none;
}

#logo {
font: bold 395% Verdana,Arial,Helvetica,"Arial Black","Helvetica Black",Gadget,sans-serif;
letter-spacing: -2px;
}
3. Change the hover color of blog title:
#logo a:hover {
color: #CECECE;
}
Change the value of CECECE if you want another color.
4. Increase site title text size:
To increase the size of site title text use following code. Adjust the value of 350 accordingly.
#logo {
font: bold 350% "Arial Black","Helvetica Black",Gadget,sans-serif;
letter-spacing: -2px;
}
5. Modify Appearance Previous and Next Links:
/* Change Appearance of Previous and Next Links */
.post-links a{
background-color: transparent;
border: 0 none;
color: #0071BB;
font-size: 14px;
font-weight: bold;
padding: 2px 4px;
text-decoration: none;
text-shadow: 1px 1px 1px #FFFFFF;
}

.post-links a:hover{
color: #ED1E24;
}

.post-links div{
color: #0071BB;
display: block;
line-height: normal;
max-width: 49%;
}

.post-links .alignright{
text-align: right;
}
.shadow-right {
padding-bottom: 18px;
}
Adjust the value of 18 according to your need.
.shadow-right {
padding-bottom: 0;
}

.social-media {
bottom: 10px;
right: 10px;
}
8. Turn widget titles to lowercase:
.block .title h3 {
text-transform: none;
}
9. Change the default font size of text inside post’s:
.hentry .post-content {
font-size: 16px;
line-height: 20px;
margin: 0 0 15px;
}
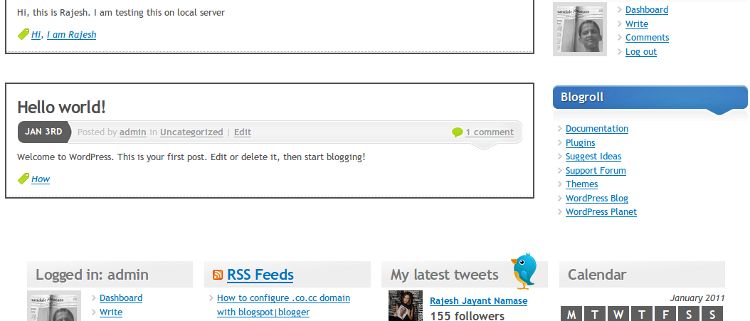
10. Border for each post:
Some people like to add border to each post, here is the code to do that,
.post{
border:2px solid;
margin:0 0 40px;
padding:15px;
text-align:justify;
}
11. Change the black background:
In Mystique theme, default background is black you can change it to other. Here we gave blue as an example. Instead of blue, you can use color value as #CECECE or any other value that you want.
body {background-color:blue;}12. Alternate header image:
To use following header image add given code below image.
/* Alternate header image */
#page{
background:transparent url(../images/extras/header-alternate.jpg) no-repeat center top;
}
If you are using child theme then give full path of the image. For example, as I am using child theme I have added following code,
/* Alternate header image */
#page {
background:transparent url(https://www.techlila.com/wp-content/themes/mystique/images/extras/header-alternate.jpg) no-repeat center top;
}
13. Center the logo picture in the header:
#logo {
width : 100%;
text-align : center !important ;
}

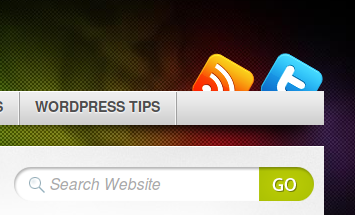
.media {
bottom: 30px;
position: absolute;
right: 2px;
z-index: 5;
}
Adjust 30px value to whatever you want.
15. Display number of post views:
As Milenko (Theme Developer) told in his forum, Post views are already implemented, but disabled by default because on large sites recording post views (ie. updating the database each time a visitors views a page) can have an impact on performance.
If you want to enable post view count, open the functions.php file from your child theme folder (should be mystique-extend) and add:
define('ATOM_LOG_VIEWS', true);Then use it wherever you want in the templates, for example in teaser.php (copy the original to your child theme folder) look for the following code:
<?php if(atom()->options('post_category') && atom()->post->getTerms('category')): ?>
<?php printf(_a('in %s'), atom()->post->getTerms('category', ', ')); ?>
<?php endif; ?>
then add the following code below above code:
| Views <?php echo atom()->post->getViews(); ?>
Inside widgets, like the “Posts” widget you can output post views by using the {VIEWS} keyword in templates.
16. Replace pages with categories like an old Mystique theme:
atom()->addContextArgs('primary_menu',categoryMenu);Now you’ll get categories in the menu.
17. Change the spacing of the blog title text:
#logo{
letter-spacing: 0; /* change this value, default is -6px */
}#header .shadow-left{
display: none;
}The better way, using a child theme: copy header.php to your child theme and remove the code for the navigation
19. Adjust ol, ul:
The list items between ol, ul are cut on the left border. Here is the code to adjust these items
.hentry ol,ul{
padding-left:15px;
}
#header {
background: url(/wp-content/themes/mystique/images/YOUR-LOGO-NAME.png);
background-repeat: no-repeat;
background-position:70% 30%;
}
Where 70% is ‘X’ co-ordinate, 30% is ‘Y’ co-ordinate. So just change: background-position:98% 50%;
to adjust the banner position
21. Star icon for order-by-views:
Only the order-by-views doesn’t have the star icon. The comment order has it though. So here is the code to add star icon for order-by-views.
.block-tabs .tabs .navi li.nav-posts-views a{background-position: 0 -37px;}22. Change the […] from excerpts with ‘Read further’:
Use Child theme and add following code in user – defined code.
<?php
add_filter('excerpt_more', 'my_read_more_text');
function my_read_more_text($text){
return sprintf(' <a class="more-link" href="%1$s">%2$s</a>', get_permalink(), 'Read further...');
}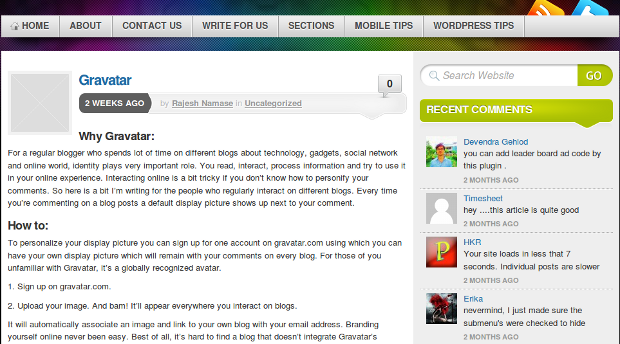
.c2right #mask-1,
.c2left #mask-3,
.c3 #mask-2,
.c3left #mask-3,
.c3right #mask-1
{background: #fff;}

.c2left #mask-1,
.c2right #mask-3,
.c3 #mask-1, .c3 #mask-3,
.c3left #mask-2,
.c3right #mask-3
{background: #eee;}
24. Fixed custom background image:
#page
{
background-repeat:no-repeat;
background-attachment: fixed;
}
25. How to make comments dofollow:
In WordPress Dashboard -> Appearance -> Editor
Open comment.php file (Recommendation: Use Child theme, copy comment.php file from parent theme folder to child theme folder) and replace
atom()->getAuthorAsLink()with
atom()->getAuthorAsLink('dofollow')By default “Show More” button is not easily visible, use following code to make it easily visible.
.no-fx .block a.more, .block .fadeThis a.more {
-moz-border-radius: 5px 5px 5px 5px;
background: none repeat scroll 0 0 #0997e1;
}
If you want color other than blue then change value #0997e1 to whatever you want.
27. Change appearance of the image which shows a number of comments on the homepage:

First, download and add icons.png image file to your Mystique Image folder (themes/mystique/images/).
.hentry .comments {
position: absolute;
right: 1px;
top: 5px;
z-index: 5;
background: url("YOUR SITE URL HERE/wp-content/themes/mystique/images/icons.png") no-repeat scroll 0 -505px transparent;
width: 48px;
height: 38px;
text-transform: uppercase;
text-align: center;
text-decoration: none;
text-shadow: #999 0px -1px -1px;
line-height: 34px;
font-size: 150%;
ont-weight: bold;
}

.hentry a.comments:hover {
background-position: 0px -543px;
color: #fff;
text-shadow: #000 0px -1px -1px;
}
Don’t forget to change “YOUR SITE URL HERE” text to your actual site URL.
28. Add transparent borders to tables:
table,table td,table th,table tr.even td,table tr:hover td{border:0;background-color:transparent;}29. Reduce the size of every post heading:
h1.title {
font-size: 250%;
}
Original value is 300%, adjust value according to your need.
img {
max-width: 468px;
max-height: 560px;
}
Adjust max-width to your preference for anyone wanted.
31. Move the tagline underneath the title:
#logo{
float:none;
}

#site-title .headline{
float:none;
border:0;
margin:20px 0;
padding:0;
}Under WordPress Dashboard -> Appearance -> Editor
In the Templates Column look for “footer.php” file.
In footer.php file search for tag and add following code before body tag:
<script type="text/javascript">
(function() {
var po = document.createElement('script'); po.type = 'text/javascript'; po.async = true;
po.src = 'https://apis.google.com/js/plusone.js';
var s = document.getElementsByTagName('script')[0]; s.parentNode.insertBefore(po, s);
})();
</script>
Then under WordPress Dashboard -> Appearance -> Mystique settings
In the Advanced tab -> “User-defined code“.
<?php
// for custom menus
add_filter('wp_nav_menu_items', 'add_google_plus_button_to_menus');

// for the default page menu
add_filter('wp_list_pages', 'add_google_plus_button_to_menus');

function add_google_plus_button_to_menus($items){

// append it to the nav menu
return $items.'<li style="float: right; margin-left: 111px; padding-top: 6px;">
<div class="g-plusone"><g:plusone annotation="inline"></g:plusone></div>
</li>';
}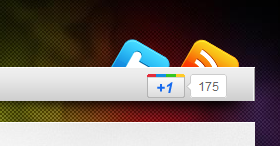
Now you’ll see Google+ button on your Mystique navbar. You can repeat same procedure to add Facebook Like button.
under WordPress Dashboard -> Appearance -> Mystique settings
In the Advanced tab -> “User-defined code“.
<?php

// for custom menus
add_filter('wp_nav_menu_items', 'add_search_to_menus');

// for the default page menu
add_filter('wp_list_pages', 'add_search_to_menus');

function add_search_to_menus($items){

// capture the search template
ob_start();
atom()->template('searchform');
$search = ob_get_clean();

// append it to the nav menu
return $items.'<li class="nav-search">'.$search.'</li>';
}
And add following code in Mystique settings -> CSS tab
/* increases top/bottom padding on nav items, so it fits the theme-default search form */
.nav-main a{
padding:12px 15px 14px;
}

/* position and width of the form: top-right */
.nav-main li.nav-search{
position:absolute;
background: none;
border: 0;
width: 250px; /* <- width of the search form, can be changed */
height: 34px;
right:10px;
top:5px;
}

/* no padding on this nav menu item */
.nav-main li.nav-search a{
padding: 0;
}

.nav-main li.nav-search li:hover a{
background-color: transparent;
}

.media {
bottom: 35px;
position: absolute;
right: 2px;
z-index: 5;
}
34. How to Change Home Page Style:
If you want to change home page appearance and want to show only post thumbnail and title of the post then create a new file and give name teaser.php to the file in your child theme folder, add following code inside teaser.php:
<article id="post-<?php the_ID(); ?>" <?php post_class('thumb-only'); ?>>
<a class="post-thumb" href="<?php atom()->post->URL(); ?>">
<?php atom()->post->thumbnail(); ?>
</a>

<section>
<header><a href="<?php atom()->post->URL(); ?>"><?php atom()->post->title(); ?></a></header>
<p><strong><?php atom()->post->terms('category'); ?></strong></p>
<footer><?php atom()->post->date(); ?></footer>
</section>
</article>
Then in Mystique settings -> CSS tab add following code:
article a img{
border: 1px solid #fff;
box-shadow: 0 0 5px 1px #888;
}

article section{
text-align:right;
}

article section header{
font-size: 130%;
}We recommend you to add Breadcrumbs to your Mystique Theme. It is a very good addition to the design because of usability and it also provides SEO benefits because it links to the path hence increasing bot activity in page indexing. Breadcrumbs provide a way to easily navigate through the site, from post to category, to the next post, or from child page, to parent page etc.
First, you need to download the Rdfa Breadcrumb plugin upload and activate it as usual. If you’re using WordPress SEO by Yoast then the method is given below to add breadcrumbs using WordPress SEO.
Note: Activate Mystique Child Theme (Mystique-Extend), then under WordPress Dashboard -> Appearance -> Mystique settings -> Advanced, look for User-defined code and add following code:
echo '<div style="font-size: 13px; line-height: 18px; margin: 1px 0; padding: 2px 0;">';
atom()->add('before_primary', function(){
if(function_exists('rdfa_breadcrumb')){ rdfa_breadcrumb(); }
});
echo '</div>';
If you’ve enabled breadcrumbs option (WordPress Dashboard -> SEO -> Internal Links) in WordPress SEO by Yoast then instead of adding above code add following code in Advanced -> “User-defined code”.
echo '<div style="font-size: 13px; line-height: 18px; margin: 1px 0; padding: 2px 0;">';
atom()->add('before_primary', function(){
if ( function_exists('yoast_breadcrumb') ) {
yoast_breadcrumb('<p id="breadcrumbs">','</p>');
}
});
echo '</div>';
After adding above code you will see Breadcrumb on your post as follows:

After adding breadcrumbs, in search engine result pages (SERP) your site results will look like this.
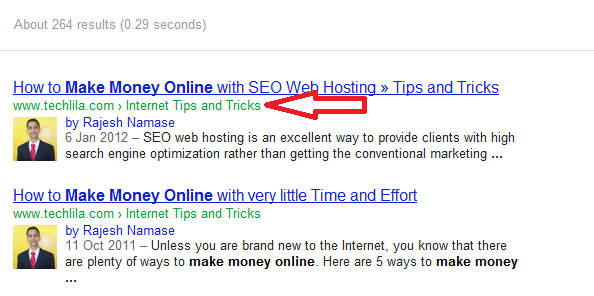
Note: It’ll take around 12 hours to 2 days to show breadcrumbs for all pages depending upon how search engine bots crawl your site. You can check your site breadcrumbs in Rich Snippet Tool.
One more thing, previous and next post link are useful when links are after the post instead of above post title, so look for code.
<?php if(atom()->options('single_links')): ?>
<div class="post-links clear-block">
<div class="alignleft"><?php previous_post_link('« %link') ?></div>
<div class="alignright"><?php next_post_link('%link »') ?></div>
</div>
<?php endif; ?>
Cut the code and paste after following line:
<?php atom()->action('after_primary'); ?>If you want to modify the appearance of previous and next post link then checkout fifth code snippet.
36. How to Make the Caption Text Larger:
If you want to change font size of caption text then add following code in Mystique settings -> CSS tab
.wp-caption-text {
font-size: 13px;
}
In the future, we will do many modifications to the Mystique theme so we’ll keep this topic updated. If you have some suggestions or problems about code snippets provided here then share it with us in form comment below, we’ll try to solve your problems.
Reference: Digitalnature Forum, thanks to Milenko.
If you like these Mystique Theme Modifications please retweet and share it with your friends on Facebook.


Steve dennis
Thanks for sharing. You can also use a dark mode plugin like Darklup when modifying the theme for giving a break to your eyes. Adding dark mode to your website can benefit you as well as your users. Whether you’re focused on reducing eye strain or simply prefer the darker look, adding a night mode option is worth the effort. It will increase the traffic in the long run.