It is fairly easy to set up goals in Google Analytics, although you should be clear in your mind what these goals should be. You are permitted to set up 20 goals per reporting view, and you can’t delete a goal and replace it with a new goal – so plan your goals carefully.

Google Analytics is an extremely useful free tool, and if you are not using it you are missing out big time on one of the best free tools on the web. Goal-setting is one of its least used features, yet can also be one of the most important. It not only analyzes specified actions on your website or blog, but also lets you know if your site is performing as you would like it to.
One example of a goal is to establish how many people purchase a product, and what steps they took to make that purchase. You can set up a goal funnel that includes the various possible steps to make the purchase. Another example is analyzing the progress of visitors through an email opt-in subscriber list using opt-in forms on your website or blog.
Let’s take a goal as being the number of people who eventually subscribe to your mailing list using a form on your home page. The funnel would be: Visiting the homepage -> Completing the form -> Clicking the confirmation link.
How to Set Up Goals in Google Analytics
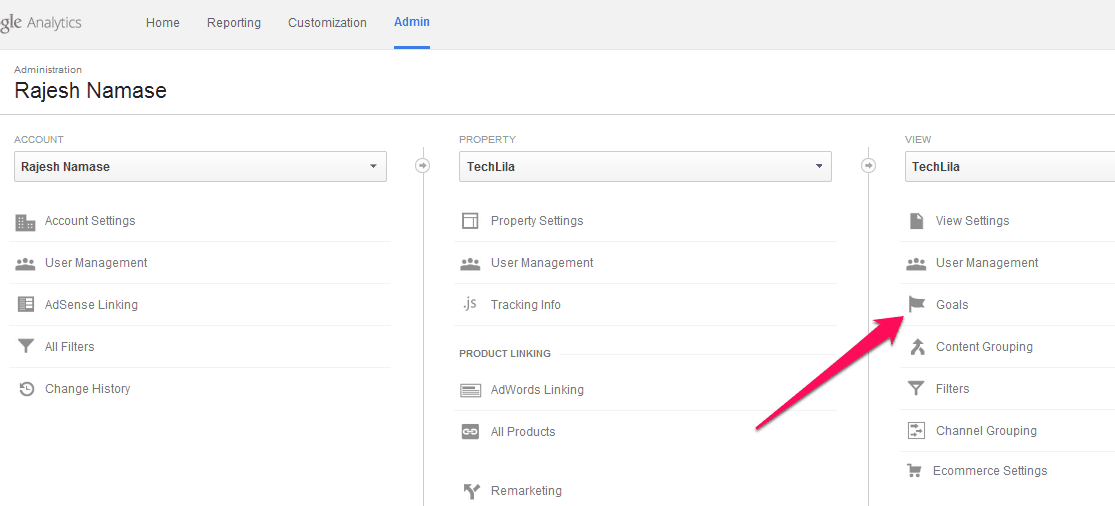
First login to your Google Analytics account. Click on the ‘Admin‘ tab:

Then select the account you want to use if you have more than one. Select the Property involved in the goal and also a view:
Properties and Views
You can have a number of blogs and websites attached to one account (these are the ‘properties‘) and each property can be associated with a number of ‘views‘. These are specific perspective of the property, such as the people who click on adverts, subscribers to an email list or traffic to a sales page.
I have created a view and named it ‘TechLila’, the goal being to establish the number of people completing my landing page subscription form. This would be the first stage in becoming a subscriber. Because I use a double opt-in, the second stage would be confirmation of the subscription.
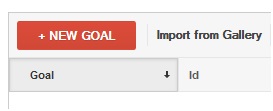
Click on ‘Goals‘ in the ‘View’ column (bottom right link in the above screenshot). You will see this:
Goal Templates and Custom Goals
Click ‘New Goal‘ to create a new goal. You now have the option of using a template or setting up a custom goal. It is easier for beginners to use templates. To choose a template, you are offered a number of checkboxes to classify the type of goal you are setting up.
Track Email Subscriptions
We are using an opt-in form as an example, so under ‘Engagement‘ click the checkbox for ‘Sign up‘ – you can choose the option most compatible with the objective of your goal.
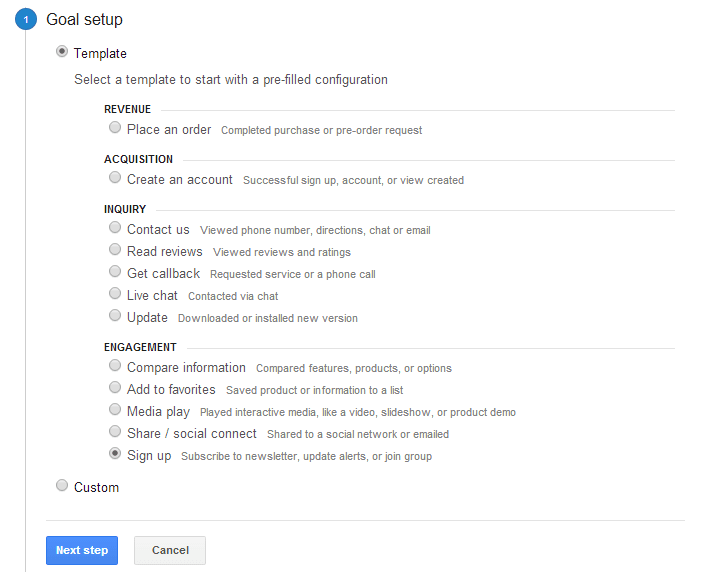
Ours is to establish the number of sign-ups and analyze the proportion of visitors to the page that actually sign up to the email list. Google Analytics now selects the most appropriate template for this type of goal. Now click on ‘Next step‘ and complete your goal description:
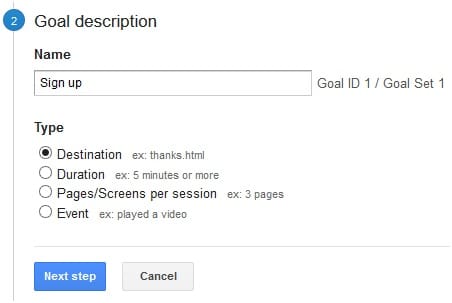
This is self-explanatory. Give the goal a name (we use ‘sign up’) and a type. Choose one of the types offered with the action that completes the goal. In our case it is ‘Destination’ – reaching the subscription ‘Thank You’ page.
Your goal might also be an event, such as playing an audio or video link, a duration, such as remaining on a page for over a specific time period or viewing a stated number of pages or screens in any one session/visit. Having described the goal, you can now click to the next step to complete the goal details:
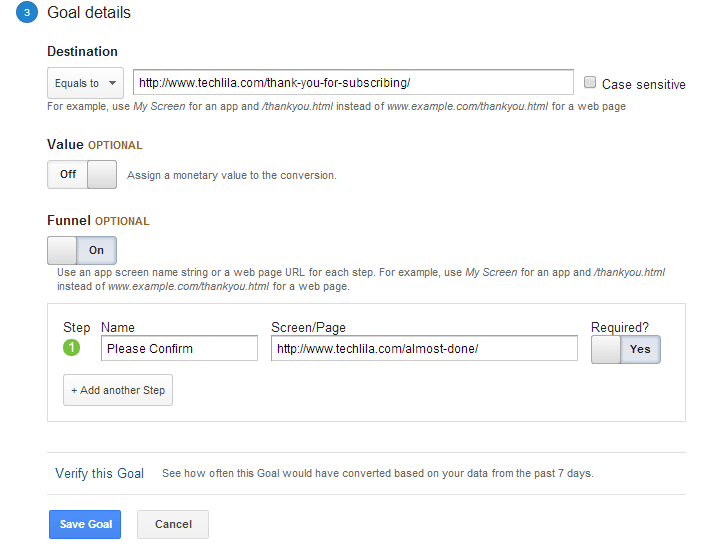
Here is a description of each stage:
Destination
This is the ultimate objective. It could be the visitor finally receiving a product download page, or led to a ‘Thank You’ page for their purchase. In our case it will be “Thank You for Subscribing” page, which might also contain a download link for any report or eBook offered in return for their subscription.
Set the match type to ‘Equals to‘ – you will rarely use the others. They would only be used if you had a variety of steps in your goal involving different media types. Enter the final destination/goal URL, in our case: https://www.techlila.com/thank-you-for-subscribing/
Click ‘Case Sensitive‘ if the URL or app screen name is case sensitive.
Value
If there is a monetary value attached to the goal, such as if the goal involved the purchase of a product or service, then enter it here. This total figure can be used to estimate the average value of each visitor to your site. More on this later.
Goal Funnel
That’s you done. However, if you have several potential steps involved on the way to the final goal, you may want to analyze progress through each one. For this you can set up a goal funnel. To do this:
- A. Click ‘Funnel‘ to ON.
- B. Next step is in provided input box, add any name e.g. ‘Please Confirm’. Then in “Screen/Page” input box enter the URL of the first stage. In our example user is arriving on this page after filling the opt-in form.
- C. The visitor of the need to click the link in the confirmation email. The final step is receipt of the ‘Thank You’ page – you do not add that here because that is the goal; the final step is the first URL you provided in the ‘Destination’ box. All you add in this stage are the web addresses of the pages a visitor will see before the final ‘Thank You’ page.
- D. Finally … when you set up Goals in Google Analytics the final step is to verify the goal.

This tests your setup, and is based upon data in your account but not real-time conversion data. It is merely a test to check that the setup is working. The actual data will begin to be collected immediately you click ‘Create Goal’.
It is possible to pause data collection for a period of time by turning the recording status OFF, and then recommencing it by turning it back to ON.
Required Step
Only click ‘Required Step’ checkbox if you want the data collection for the entire funnel to stop if that specific step is not followed. If you have optional methods of attaining the goal, then they will not be recorded unless each is set up as a separate goal. Also, nobody slipping into the process from another source will be recorded if this option is selected.
However, if you have a funnel where you do want a specific goal to be essential to the process, then click it as a required step. Then, anybody entering the funnel farther down will be excluded from the analysis.
As you can see, you can continue adding URLs of each stage in the funnel until the entire process is mapped out. The results will start coming in once the system is in operation and new subscribers are visiting your blog or website.
It would then be possible to establish the average monthly and annual income from subscribers who purchase products from emails you send out to your list. With this information you can place an average cash value to each visitor. For example:
- Say you get 2,000 visitors/month and 10% subscribe, you then get 200 subscribers/month.
- You make, say, $1,000/month from 2000 subscribers in your list.
- That means each subscriber is worth, on average, 50c/month.
- So, if 10% visitors to your site subscribe, then each visitor is worth 10% of 50c= 5c.
- Since the goal counts each subscriber, you could add the 50c as the average cash value of the goal when you set it up.
Cash figures are just a rough estimation, and may vary each month, but over a year it should be fairly accurate. By setting goals in this way, you can establish a cash value for each visitor to your blog. It’s not accurate enough to bank on it, but it’s a useful figure to know, so that balancing projected income with expenditure is more than just a blind guess.
Types of Goal or Event
There are four different types of goal and event as briefly discussed earlier. We have described the most common of these above. Goals such as these, with a specific destination, are the only ones with which you can use goal funnels.
The other types are:
Duration
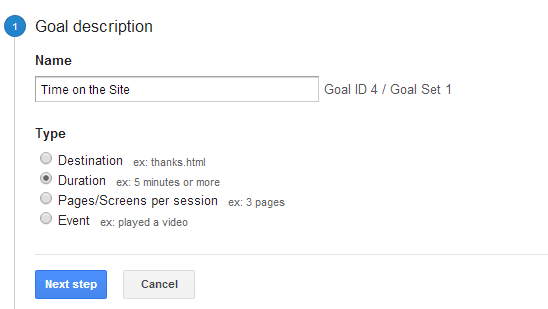
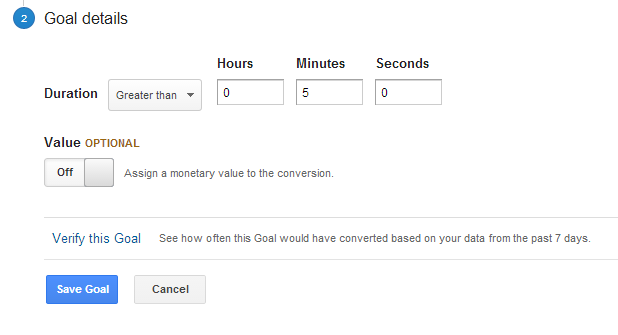
Visits that last for at least a specified time. For example, you can record those that spend at least 15 minutes on a specific web page. This is useful if you also run destination goals, when you can establish whether or not such visitors took any specified clicking action during those 15 minutes. You can set the duration to 5 minutes or 30, whatever period of time that gives you the most useful information.
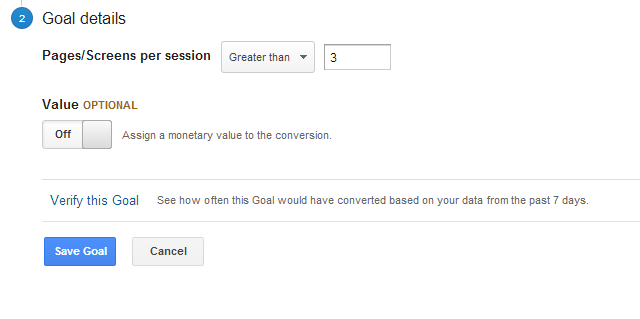
Pages or Screens Per Session
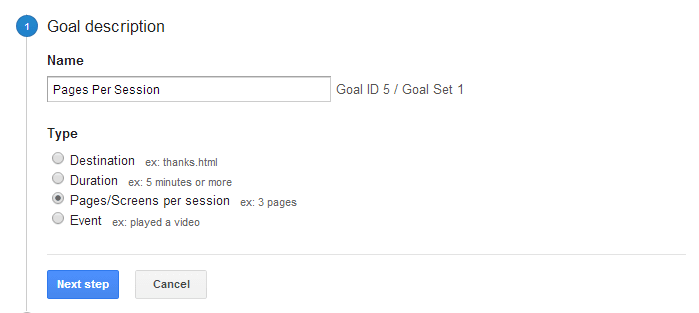
Your visitor loads at least a specified number of pages or screens. For example, you might want to know how many search your blog beyond the initial landing page (2 screens) or even browse around more extensively.
Event
You can define a specific event as an action. Examples include playing a video on the page, clicking an advert or even making a recommendation such as a Google +1 or a ‘Like’.
Each of these can be useful to you if you have a need for the information. If you select the ‘Custom’ option after clicking ‘Create Goal’ you will be offered each of the above options. It is also likely that if you select the appropriate option in the list of templates provided that you will be given the most appropriate for your needs.
To get this you must have chosen the correct industry category when creating your property. Edit your property and select the Industry Category closest to the purpose of your blog – or even just of the purpose of that part of your website or blog most closely related to the goal you are creating.
Tracking Affiliate Links with the Yoast Google Analytics for WordPress Plugin
The “Download Google Analytics for WordPress by MonsterInsights” plugin facilitates the application of Google Analytics on your blog. It doesn’t do all the work for you – you still have to register with Google.
One of the inadequacies of Google Analytics is that it cannot track outbound links. The only way you set goals to track affiliate sales, for example, is to arrange buyers to receive a link to a ‘Thank You’ page on your site, and then assume that everybody achieving the goal (clicking to this page) represents a sale – and also that every buyer clicks to the page!
The problem here is that an affiliate link usually leads your visitor to the seller’s sales page. There is no way to attach a link back to your website or blog from that page. If you have a need to more accurately track outbound links such as affiliate links, then the Yoast Analytics plugin enables you to do so.
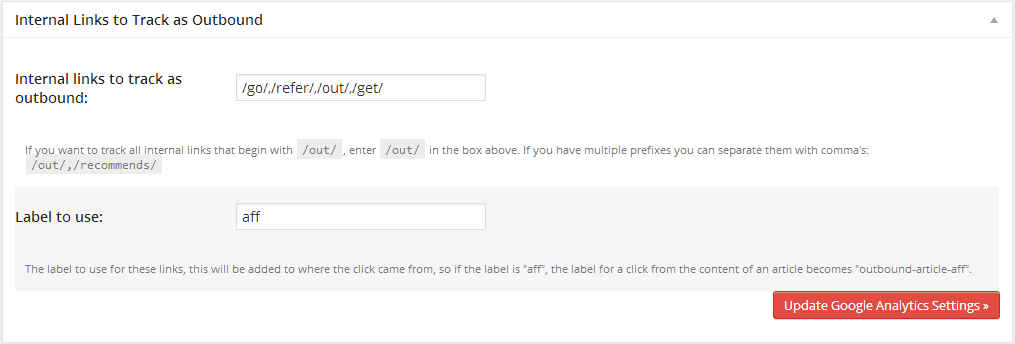
Simply enable outbound link tracking in the plugin and name all the affiliate links you want to be tracked. You can select all links starting with ‘recommends’ for example, or contains the word ‘refer’. For example: https://techrt.com/refer/hostgator/
You can also add a label such as ‘aff’ so you can tell that a particular tracked link is an affiliate link.
‘Track Outbound Links & Downloads’ checkbox and you can use analytics to find out what outbound links people clicked and downloads they received by doing so. Also, internal links can be tracked as outbound links.
You use the following categories in Google Analytics (while creating goals) to fine-tune your results:
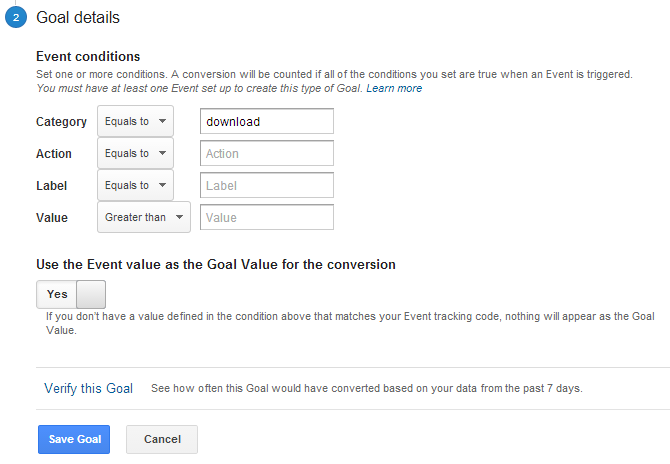
- download: this tracks the total number of downloads.
- outbound-article: tracks clicks on links within articles.
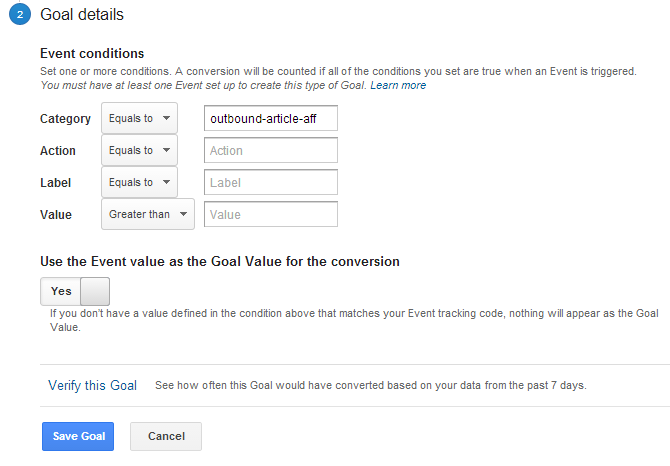
- outbound-article-aff: tracks affiliate clicks within articles.
- outbound-comment: tracks clicks on links within blog post comments.
- outbound-widget: tracks clicks on links from widgets.
That’s how to track clicks on affiliate links using Yoast. You can find all these tracked data as events under Behaviour -> Events.
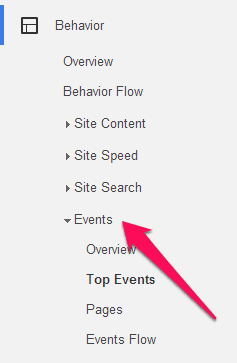
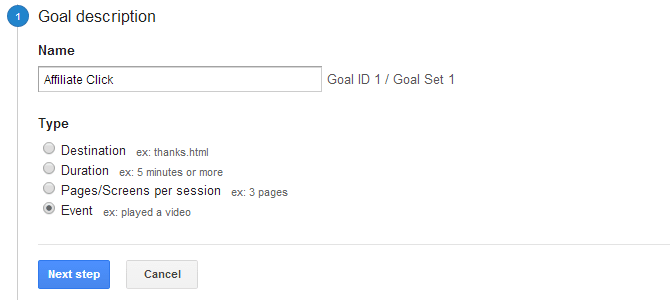
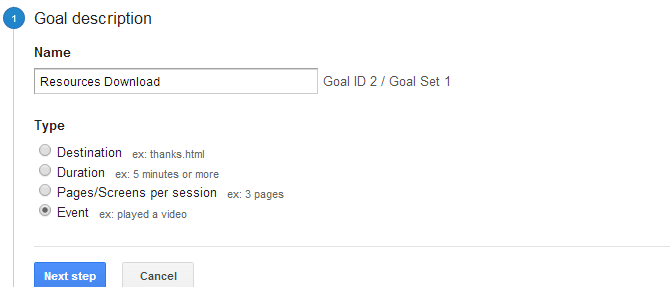
You can also use these data in Google Analytics goals as shown below.
Goal – Track Affiliate Clicks
Goal – Track Number of Downloads
Tracking Affiliate Links Using Manual Link Codes
If you don’t prefer using Google Analytics plugin then use this method. While you cannot directly track outbound affiliate links using Google Analytics goals, you can set up goals to track events. An ‘event’ is a different type of goal to a’ destination’ in that a tracking code can be added to affiliate links on your own web pages and blog posts. Goals will then track when such links are clicked. You have to set up a tracking code on each affiliate link you want to track. Here’s how you do that.
Tracking Events
Using Google Analytics, you can track just about anything that happens on your blog or website. We have discussed setting up goals to identify when visitors land on specific addresses within your blog or website. Obviously, this cannot be done if the landing page is outside your own site. Google Analytics cannot follow a link, it can only identify when a page on your own site is visited.
However, it can identify events, such as clicking a link, even if it cannot tell what happens after that. By setting up goals for events, you can analyze when, where and how often specific affiliate links are clicked. This is fundamentally the way that the Yoast plugin does it. You start by placing a code in each link you want to track.
The event in this case will be a click on an affiliate link, specifically the affiliate link: https://techrt.com/refer/hostgator/
In Google Analytics, the default event tracking code takes this format:
[html]
onclick=”_gaq.push([‘_trackEvent’, ‘category’, ‘action’, ‘label’]);”
[/html]
We now have to change the three values within this code:
- Category: This is the type of event, for example play a video or click an affiliate link. We shall name the event ‘affiliate’.
- Action: Use this to name the action. This is clicking a HostGator affiliate link here, so we shall use ‘hostgator’ – you can use any term you like to name the action.
- Label: You can use any description or label you want. We will use the name ‘aff-page’ for ‘affiliate page’.
We now have:
[html]
onclick=”_gaq.push([‘_trackEvent’, ‘affiliate’, ‘hostgator’, ‘/aff-page/’]);”
[/html]
You now need to add this to your affiliate link, such as:
[html]
Get HostGator
[/html]
So your final tracked link will look like this:
[html]
Get HostGator
[/html]
Every time a visitor clicks on this link, Google Analytics will log it as an affiliate link click for the product HostGator on the page ‘aff-page’ where the link is published. Now we can set up the goal, which is to count the number of affiliates clicking on this link.
Begin setting up a new goal as above, but rather then select a template, click the Custom checkbox and you get this screen:
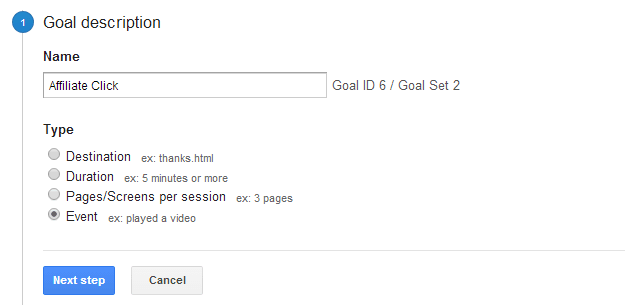
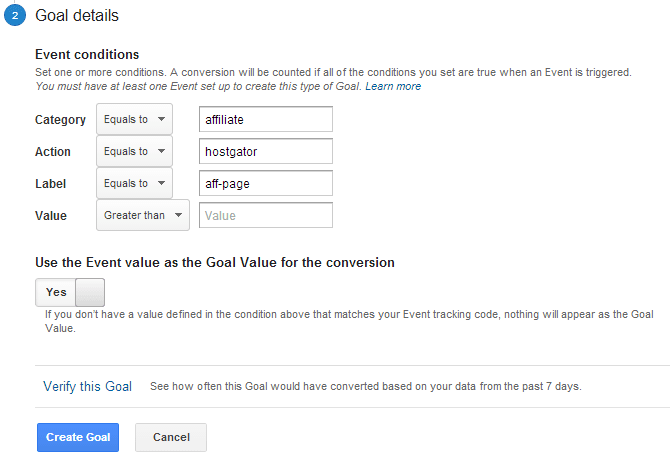
Now simply click the ‘Create Goal’ button and you are done. You can test it using the Verify button.
How to Use Goals in Google Analytics to Your Advantage
There are many ways to use goals to improve your website, blog and also your income. Here are just a few of these that I am sure that you can expand on:
Links to Sales Pages
Track links to your sales pages, not only from different web pages, but also from different areas on your individual pages. By giving each link a unique reference you can assess which perform better than others. This not only enables you to make best use of the most popular areas but also to identify locations within your site for your most important links and information.
Links Within Sales Pages
Not only can you establish the proportion of visitors to a sales page that actually buy, but also the most used design of sales button and their location on the sales page.
As explained earlier, if your ultimate goal is sales then you can find that information easily. You can also analyze the web pages or blog posts that provide most sales. Just as important, you can identify your poorest performing pages and button/sales link designs. A lack of sales might be due to a poor landing page, a badly designed sales pages or insipid calls to action.
You would never know which of these was relevant to your site, but if you set up goals in Google Analytics and add the free Yoast “Google Analytics for WordPress” plugin, you can also analyze both internal and external sales links.
The benefits of all this are immeasurable. Those that make most money online also tend to test the most and analyze the most. You can use goals to test different sales page designs and even carry out split-testing of sales buttons! As the great Corey Rudl always said, you can never test too much. Testing and analyzing is the key to success!


Leave a comment
Have something to say about this article? Add your comment and start the discussion.