Was your HP monitor working fine, but now it keeps going to sleep mode randomly & unexpectedly when it should be displaying video?
When your monitor goes to sleep, does it say something like: “No input signal”, “Monitor going to sleep” or “No signal detected”?
Does it sometimes get worse and your HP monitor gets stuck in sleep mode, forcing you to manually restart your computer?
If your answer to one of these questions is YES, I got some news for you. I’ve been there, done that. I, for one, was focused on watching a movie when out of nowhere, the monitor went “No input signal” and then I faced a dark HP screen.
Another piece of news: I can show you the ways how to stop HP monitor keeps going to sleep issue from happening again!
HP Monitor Keeps Going to Sleep
If your HP monitor is having difficulties staying awake, we recommend that you first power cycle your monitor since this is typically helpful. If needed, unplug the display cable and examine it visually, or replace it with a different type. Moreover, it’s essential to check your PC’s sleep settings. If none of these solutions helped, you should open your computer’s case and check the RAM sticks and the GPU.
Why Does My HP Monitor Keep Going to Sleep?
It’s quite difficult to pinpoint the exact reason why your HP monitor is going through this issue, as there are a lot of variables and tests that need to be made before you can isolate and locate the real reason.
However, what we can do is list all the hardware and software issues that could be blamed for this issue, including:
- Damaged or loose monitor cable
- Faulty, loose, or dusty RAM sticks
- Misconfigured power settings
- Faulty or overheating graphics card
- Corrupted, inoperative, or outdated graphics card driver
- Faulty power supply unit
- Damaged monitor itself
How to Fix HP Monitor Keeps Going to Sleep
Fix #1: Power-Cycle Your Monitor
When it comes to general monitor issues, regardless of the brand, the first step in the troubleshooting process should always be power cycling the monitor.
When you power-cycle your monitor, that will clear any bugs & glitches that might be causing the issue. This is why this simple step, most of the time, works like magic in fixing numerous issues.
To power-cycle your HP monitor, start by:
1) Turning your PC and monitor off.
2) Unplug the monitor and PC from the power outlet.
3) It’s necessary to unplug all the other cables connected to the monitor as well.

4) Press and hold the power button of your monitor for about 30 seconds. This will drain any remaining power.
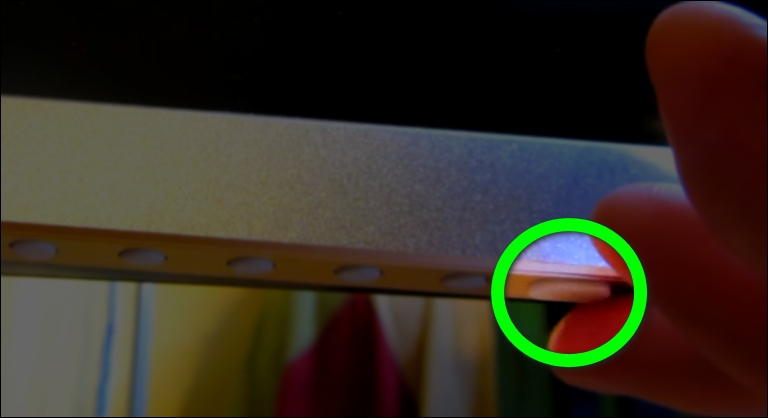
5) After that, wait about 5 minutes before plugging everything back and turning your PC and monitor on again.
Fix #2: Check The Display Cable
If your HP monitor keeps going to sleep and saying “no input signal” at the same time, then the most likely cause of this issue is the display cable.
Either the display cable is damaged, broken, loose, or bent excessively, among others.
“What can I do to make sure this is not the case?”
Simply, all you have to do is:
1) Fully unplug the display cable and examine it visually for any signs of wear and tear. Plus, don’t forget to check the connector pins.
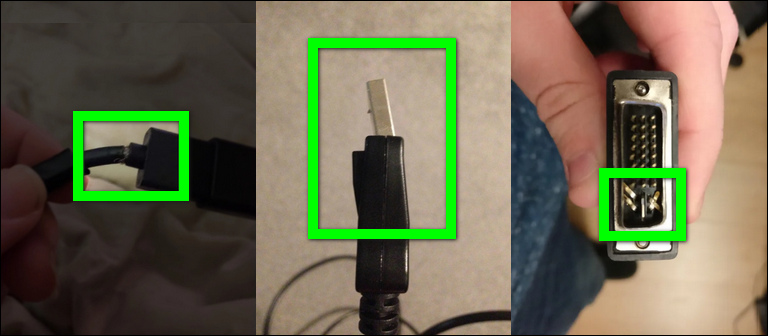
2) Make sure both ends of the display cable and the ports on your PC and monitor are clean, dust-free, and without damage.
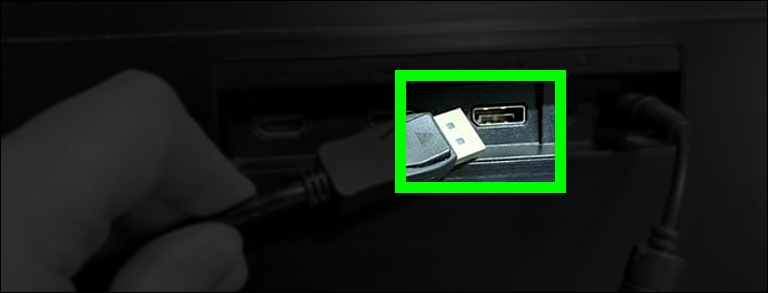
3) If so, replug the display cable back, and make sure it’s firmly plugged into your computer and the backside of your monitor.
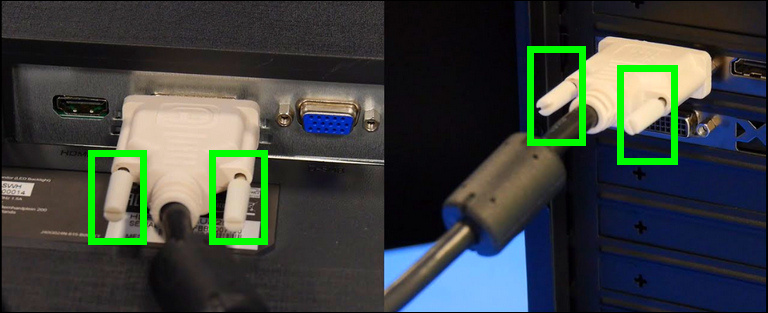
4) If it’s possible for you to get and try a brand-new display cable, do so, as this will clear any doubts.
Fix #3: Try an Alternate Display Cable
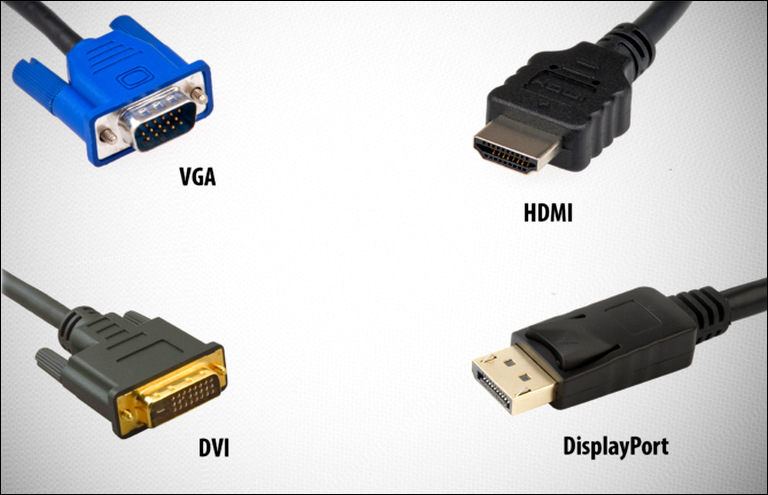
Another easy and simple solution that seems to be successful in fixing this HP monitor sleep issue is to try a different type of display cable.
In other words, if you’re currently using a DVI cable to connect the HP monitor to your computer, try switching to a VGA or an HDMI cable.
Fix #4: Check Your PC’s Sleep Settings
Sometimes, your HP monitor is working properly, but the cause to blame for its sleep issue is misconfigured system settings.
That is, if your computer is set to enter sleep mode after a short period of time, then your HP monitor will keep going to sleep mode, annoyingly interrupting your work.
To make sure this isn’t the case:
1) Open the Start Menu, search for and open Control Panel.
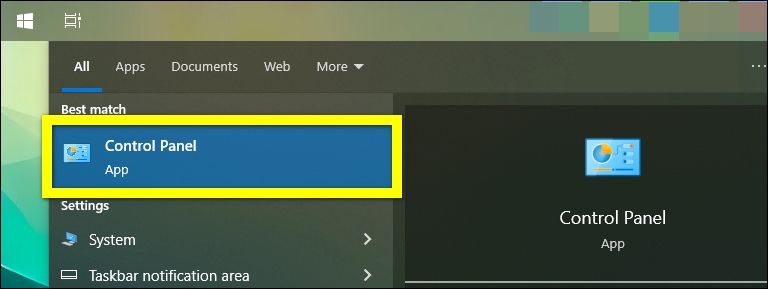
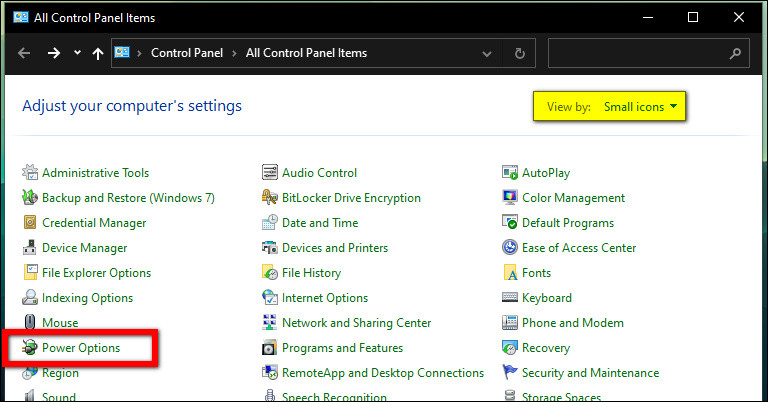
2) Navigate to Power Options (make sure the View by is set to Small icons).
3) Select “Choose when to turn off the display” from the left pane.
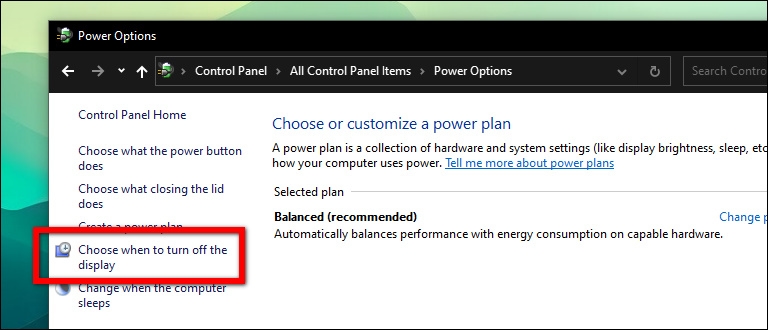
4) Now, for “Turn off the display” and “Put the computer to sleep”, set the “Plugged in” options to Never.
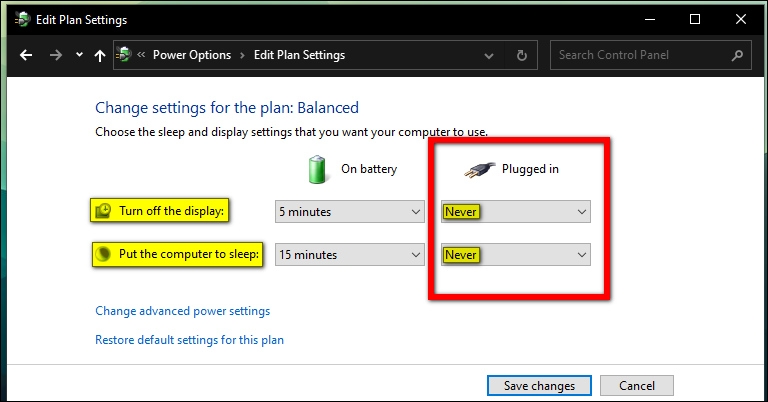
5) Next, click on “Change advanced power settings”.
6) Click the [+] icon beside Sleep to expand it.
7) Then, do the same thing to expand the Allow Hybrid Sleep option. After that, ensure the option is turned off on both Plugged In and On Battery.
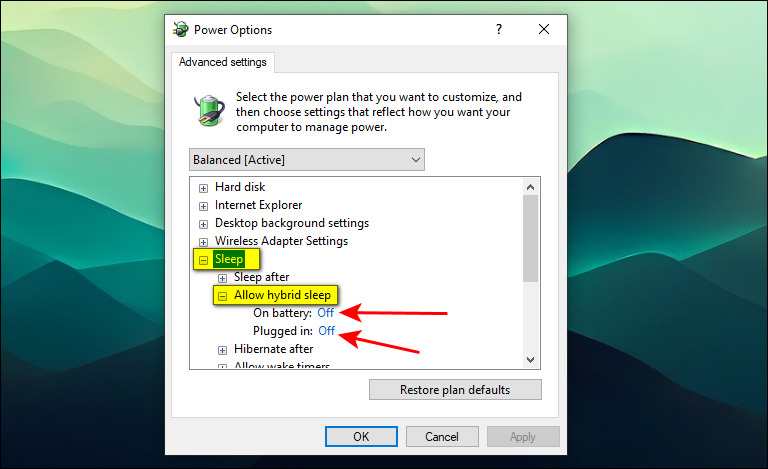
8) Press OK to save changes, and don’t forget also to click the Save changes button before closing the window.
Fix #5: Check Your PC’s RAM Sticks
Since we’ve been researching monitor issues for a while, let us tell you that most of the time, the root cause of these types of issues, is your computer’s RAM sticks.
Also, by observing other users’ reports in multiple instances, just removing the RAM sticks and cleaning them of any dust or dirt, and then reinserting them can fix the issue immediately.
And that’s what we advise you to do:
1) Power off your PC and unplug the power cord and all other cables.
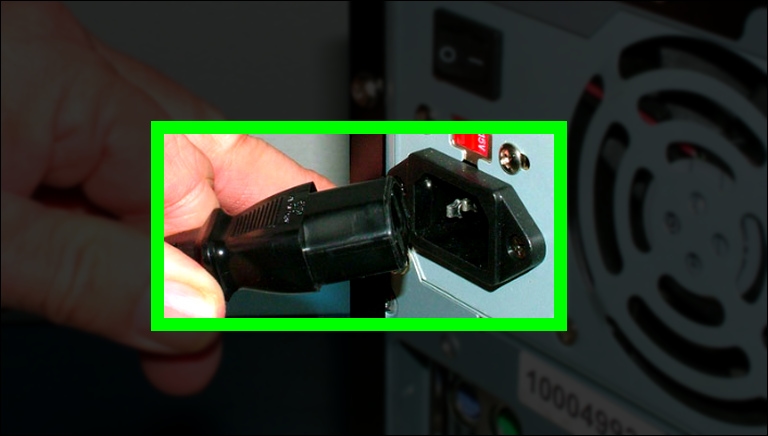
2) Take out all the screws holding the side panel of your computer case to access the motherboard.
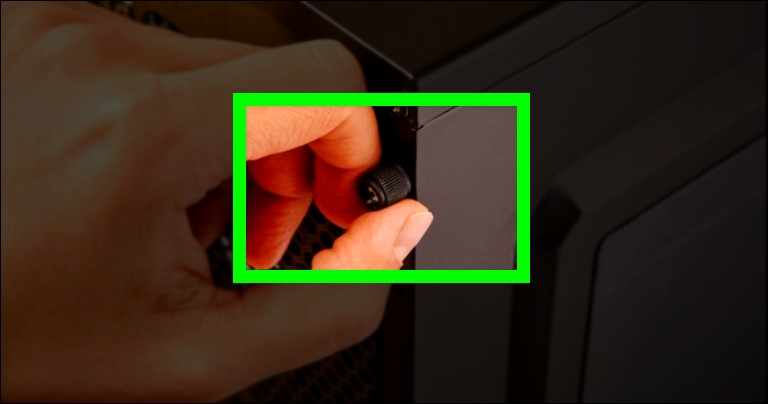
3) Locate the RAM sticks, then gently push down the side clips to release the RAM sticks one by one.
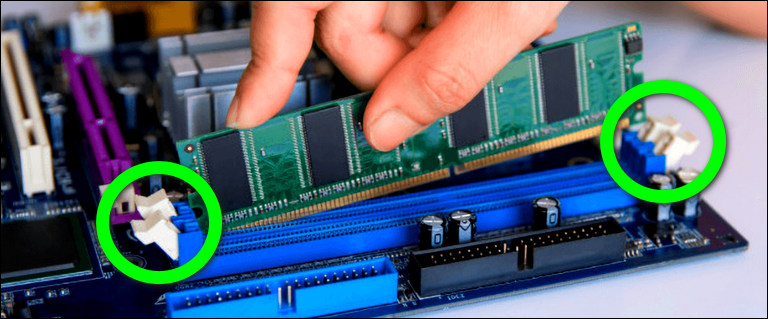
4) If the RAM sticks are a bit old, dust is most likely to build up on the gold contacts. Thus, use a soft cloth that won’t leave fibers behind to clean the contacts gently.
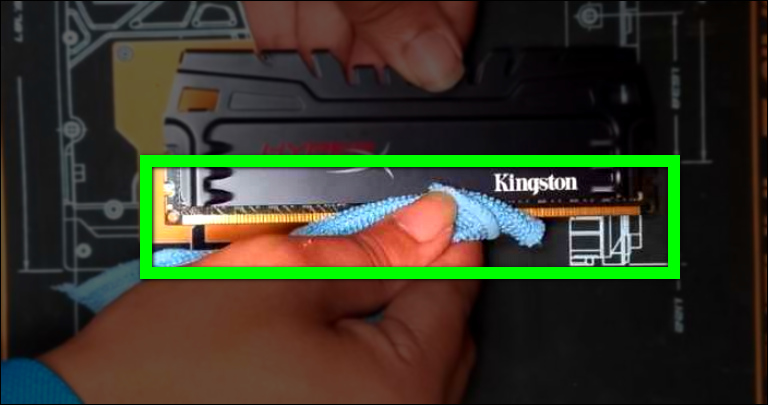
5) Don’t forget to use a hairdryer set on cold air to blow any collected dust from the RAM sticks and the RAM slots as well.
6) Examine the sticks visually for any signs of damage. If you notice any, then you will likely have to replace them with new ones.
7) After all is done, reinstall the RAM sticks into the motherboard, and make sure they are correctly installed into their slots. (This is a crucial step, do it slowly and carefully).
At this point, you have finished the process. Put everything back in place, and connect your computer to power and turn it on.
Fix #6: Check Your PC Graphics Card
Several users reported that the cause of the HP monitor sleep issue is another hardware one, specifically the graphics card. Either it’s faulty, overheating, or dusty.
To make sure this is NOT the case, you need to take a few actions. Let’s start with these:
1) Shut down your computer and unplug the power cord plus all other connected cables.
2) Open your computer’s case so you have access to the motherboard.
3) Take out your graphics card from its slot carefully.
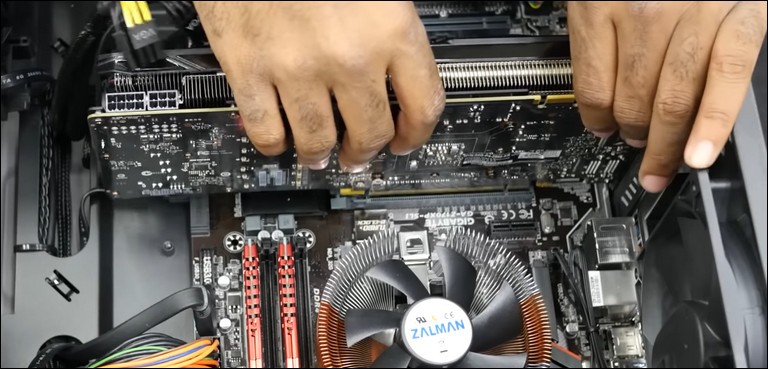
4) Now, clean the graphics card from any dust using an air compressor set on cold air.
5) Don’t forget to clean the GPU contacts using a soft and clean piece of cloth that won’t leave fibers.
6) Also, inspect the GPU for any signs of damage.
7) Now, reinstall the graphics card into the motherboard, and make sure it’s seated properly into its slot.
8) Put everything back in its place and make sure all the cables are plugged in firmly.
9) You also need to make sure your GPU is NOT overheating, which can be achieved by using a GPU temperature monitoring tool like Open Hardware Monitor, or HWMonitor.
Fix #7: Undo Any Changes You Made to Your System
If you have made any changes to your system recently, after which your HP monitor started to go to sleep randomly, then there’s no doubt that these changes are to blame.
In this scenario, the solution is simple: undo any modifications you made on your computer.
If you can remember exactly which setting you changed, and you can restore it to its previous state, do so. For example, if you’ve updated a certain driver, you can “roll back” to the previously installed one, using Device Manager and the Roll Back Driver option.
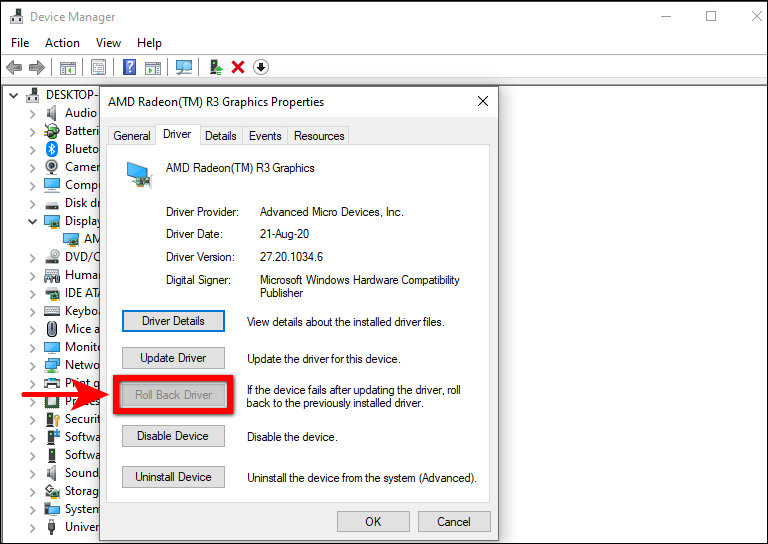
Otherwise, the best way to undo any system changes is by performing a “System Restore” which will roll back your system to a previous restore point. To do so, just:
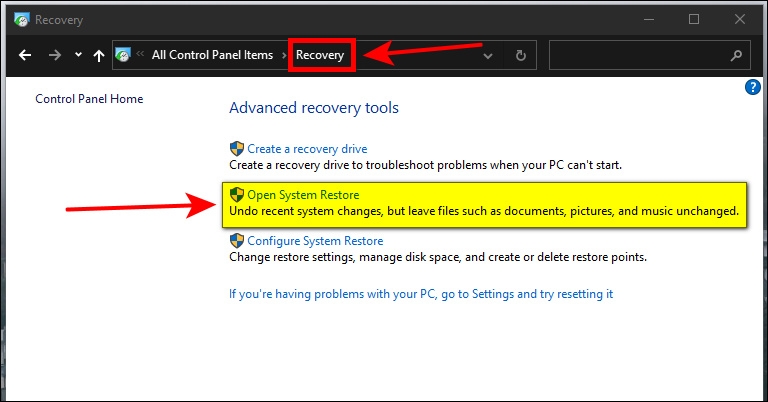
1) Open the Start Menu, search for and open Control Panel.

2) Navigate to Recovery, then select Open System Restore.
3) Click Next, select the restore point that you want to use, and then click Next again.
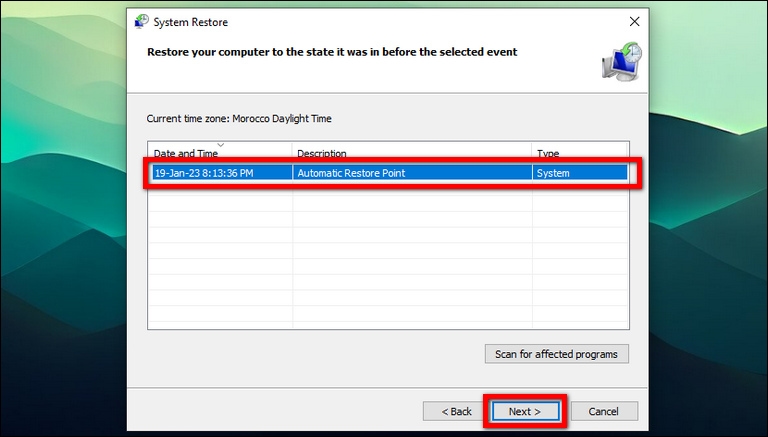
4) Finally, click on Finish, and let your computer finish the system restore process completely.
Fix #8: Reset BIOS to Default Settings
Another solution that seems to be effective is resetting the BIOS to the default settings.
If you don’t know what the BIOS is, basically it stands for Basic Input/Output System, and it’s software that instructs the computer on how to perform its most fundamental functions.
BIOS in a computer is like the foundation of a house. It sets up the basic parameters for how the computer will function and provides a platform for other software to build upon.
The BIOS settings can become corrupted due to different reasons, and your computer will start to malfunction.
To reset your BIOS to the default settings:
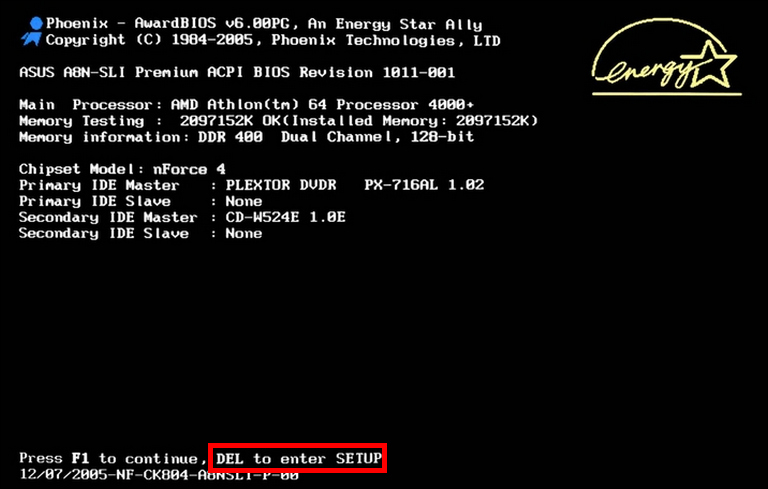
1) Enter BIOS Setup by restarting your computer and simultaneously pressing the BIOS key: F10, F2, F12, F1, DEL (or depending on your PC brand).
2) Use the Arrow keys to navigate through the BIOS tabs & settings, and search for the reset option which can be labeled as Load Setup Defaults, Load Default Configuration, Restore Defaults, or Load Optimal Defaults.
3) After locating and highlighting the reset option, press the Enter key, then select [Yes] to confirm the BIOS reset process.
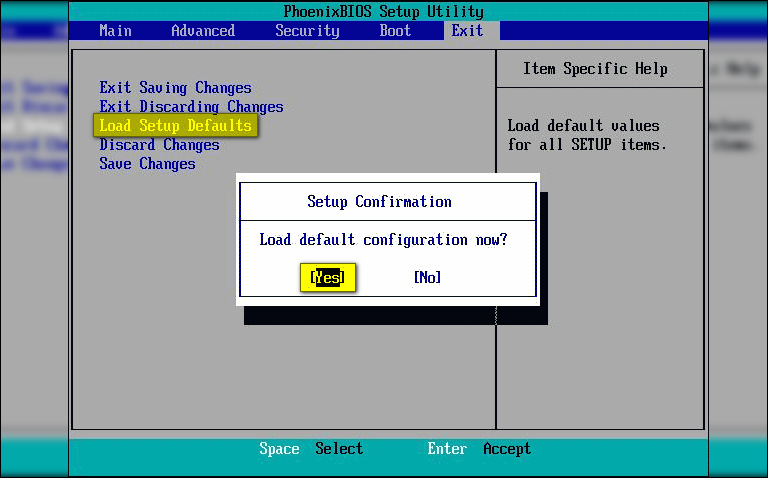
4) Finally, don’t forget to Save and Exit when you’re finished.
Fix #9: Reinstall the Display/Graphics Driver
A driver is a software that allows Windows OS to communicate with and control the hardware device. Without drivers, hardware devices are useless.
However, this piece of software is susceptible to corruption or failure for any reason, which leads to problems popping up everywhere.
Therefore, it’s very reasonable that your HP monitor is acting unexpectedly and going to sleep mode when it shouldn’t, because the display adapter (graphics card) driver is damaged or corrupted.
In this case, it’s recommended that you reinstall the display/graphics driver, which can be achieved by following these steps:
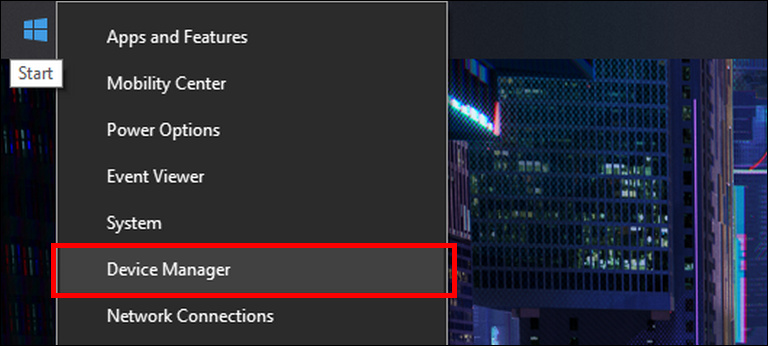
1) Right-click the Start Menu button, and select Device Manager.
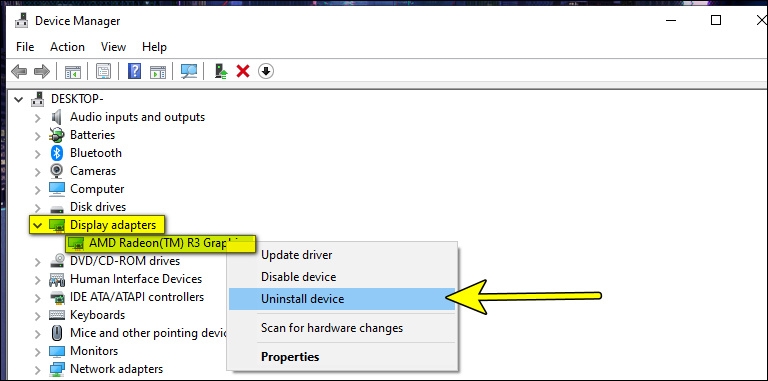
2) Navigate to Display adapters, right-click on your graphics card, and select Uninstall.
3) On the confirmation window, make sure to check the “Delete the driver software for this device” option, then click “Uninstall”.

4) Now, restart your PC and your Windows OS will then attempt to reinstall the driver.
5) If it fails to do so, then you have to do it manually by going to the manufacturer’s website (AMD, Nvidia, or Intel) and downloading the drivers.

6) Or, if that seems too complicated for you, you can use a driver updater like Driver Easy, Driver Booster, etc.
Fix #10: Check Any Outdated Drivers
As outdated drivers are also to blame for many PC & monitor issues, you have to keep essential drivers always up-to-date or your PC will start to misfunction.
Normally, Windows 10/11 users don’t have to worry about keeping PC drivers up-to-date as the system will handle it automatically through regular Windows updates.
However, Windows is not perfect and might fail to keep important drivers up to date, so you have to do the job manually.
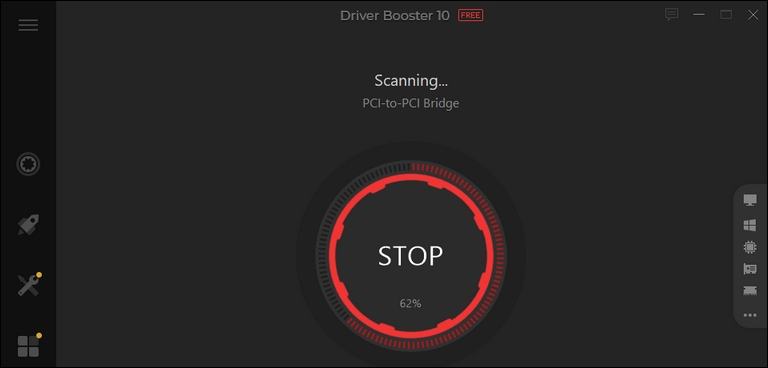
The best way to check and update all Windows OS drivers at once is by utilizing a driver updater program, such as IObit Driver Booster.
Fix #11: Try a New Power Supply Unit
If your computer is not receiving enough power from the power supply unit, the monitor will be switched off.
Therefore, if none of the suggestions above worked, and your HP monitor is still randomly going to sleep, the power supply unit might be the source of the issue.
In this case, the best course of action is to get a brand-new power supply unit, replace it with the current one, then check to see whether your HP monitor is still having trouble staying awake.
Frequently Asked Questions

How Do I Stop My HP Monitor From Going to Sleep?
First, go to the Start Menu and search for Control Panel, then navigate to “Power Options” and select “Choose when to turn off the display” from the left pane. Next, set the “Plugged in” options to Never for both “Turn off display” & “Put computer to sleep”. Finally, before closing the window, click the Save changes button.
Why Does My HP Monitor Keep Turning Off?
When talking about monitor issues, it’s always because of:
– The Power or sleep settings are incorrect.
– The monitor cable is damaged or loose
– RAM sticks are either faulty and require replacement, loose and require proper installation, or dusty and need to be cleaned.
– The graphics card is faulty, overheating or its driver must be reinstalled.
– It’s time to replace the power supply unit.
The Bottom Line
Each one of these solutions has been shown to be effective in resolving all types of monitor issues, including the one you’re currently experiencing.
So, we hope that one of these solutions helped you stop your HP monitor from going to sleep randomly. But if they didn’t, we’re sorry we were unable to assist you with your problem.
In this case, the issue is probably within the monitor itself, which should be taken to a technician or replaced with a brand-new one.

![pii email 1ea62df2564daf6c39d5 [pii_email_1ea62df2564daf6c39d5]](https://techrt.com/wp-content/uploads/2021/12/pii-email-1ea62df2564daf6c39d5-150x150.png)
Leave a comment
Have something to say about this article? Add your comment and start the discussion.