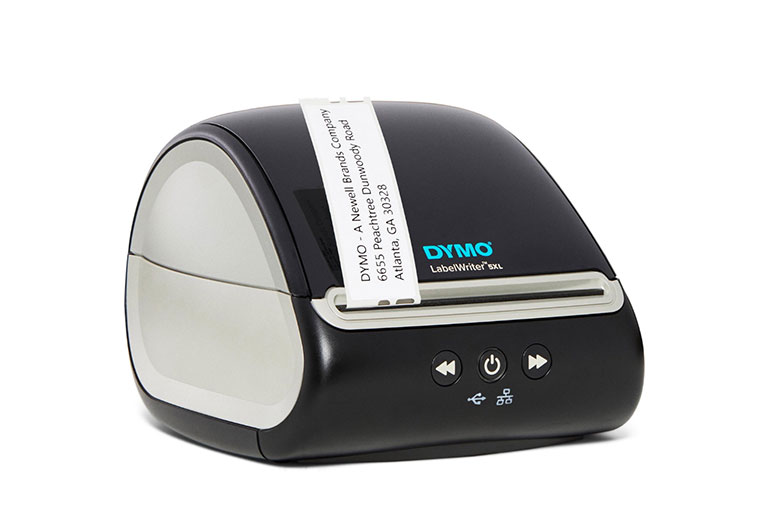
Dymo makes most reliable label printers, such as the Dymo 4XL, Dymo 450, and Dymo 450 Turbo. Unfortunately, these devices are having some issues after the release of the Windows March update.
I know this myself, and here’s my experience: I needed to label a bunch of files pronto, got my Dymo label printer, popped in some blank labels, and then started printing. Of course, I expected my professional-looking labels, but all I got back were my Dymo printing blank labels still!
I did get my Dymo printer back up and running properly, so here’s my guide to help you fix yours.
Dymo Printing Blank Labels
The Dymo label printer printing blank labels is because of improper alignment of labels. So, try to load the labels properly and use Dymo branded labels only. A dirty sensor can also cause this problem. To fix this, feed the Dymo cleaning card about ten times through the printer to clean it thoroughly.
Some other factors that cause the Dymo LabelWriter to print blank labels include power strip overload, incorrect printing settings, or incompatible Dymo LabelWriter firmware. Unplugging any additional device from the power strip, modifying the printing settings, and reinstalling the Dymo LabelWriter firmware usually solves the issue.
Note: Most Dymo printer models, like the Dymo 400, Dymo 400 Turbo, Dymo 450, Dymo 450 Turbo, and Dymo 4XL, have almost identical functions and can be set up in the same way. So, the troubleshooting steps you’ll apply will work on all of these Dymo models.

Why Is My Dymo Printer Prints Blank Pages?
You might wonder why my Dymo printer prints blank pages and how I will deal with this.
These are some primary reasons that cause your Dymo to print blank labels:
- Improper alignment of printer labels
- Printing settings are not correct
- Too much dirt on the printer sensor
- Plugged in too many devices into a single power strip
- The Dymo LabelWriter firmware is either incompatible or corrupt
How to Fix Dymo Printing Blank Labels?
Follow these troubleshooting steps to fix Dymo printing blank labels:
1. Properly Clean the Sensor of Your Printer
Adhesive, debris, and dirt build up after some time on the inner part of your Dymo label printer. These tiny particles hinder the sensor’s ability to detect the labels properly. As a result, your printer starts printing blank labels.
So, it’s best to clean the sensor 2-3 times a month for reliable functioning. There are two ways to clean the sensor of your printer:
A. Use Your Dymo Cleaning Card
The first way is to use your Dymo cleaning card that comes with your printer at purchase. There’s no need to worry if you’ve already used or lost it, as you can buy more from Amazon or Walmart.
Follow These Steps to Clean the Sensor Using a Dymo Cleaning Card:
- Lift the cover of your printer and then remove its label roll.
- Take out the cleaning card from its package. You should use the card immediately after opening the package.
- Now, feed the card into your label printer, just like you would a label.
- Your label printer will sense the cleaning card automatically and feed it through the printer. If it fails to detect the card automatically when inserted, press the feed button to feed the card through.
- Make sure to repeat the process several times for its thorough cleaning. After that, take out the cleaning card and dispose of it.
Now, you’re ready to use your printer again.
B. Manual Cleaning
If your cleaning card didn’t help, you should try cleaning your device manually.
Open the printer from the top and carefully remove the spools along with the labels and then gently remove the face of your device.
Pull the drive roller cover and look inside to check for label adhesives that may have stuck to the driver over time.
Next, check the print head for any obstruction. To do this, lift the label release lever and look inside. If you find something, remove it using a bendable, small non-metal item.
During cleaning, also look underneath the printer sensor for any tiny objects. You can use the end of a dental floss pick to remove any label or adhesive.
Note: You should never use any metal item to clean the printer since you could easily scratch the print head. Instead, use an adhesive remover and a cotton swab or WD-40 cleaner to remove any remaining adhesive.
Once you finish cleaning, return the drive roller cover to its original position and put the printer’s face back. Feed the cleaning card through the printer to remove any remaining debris from the print head.
Finally, align the labels properly and then attempt to print.
2. Check the Alignment of the Labels
As you know now, Dymo printers have sensitive sensors. A little bit of debris or dirt can cause sensors to print blank labels.
Additionally, the printer heavily relies on the position of the inserted labels. If these are not properly aligned, it might cause the Dymo printer to malfunction.
To fix this, first, check the labels you’re using. You must use original Dymo brand labels because other brand labels feed unevenly through the sensor and might damage the printer.
Plus, you’ll be unable to claim the Dymo warranty if you damage the printer using the off-brand labels.
Once you get the genuine Dymo brand labels, follow these steps to align the labels properly:
- Lift the cover of your printer. You’ll see a black plastic roll that has labels on it. Squeeze both ends of this circular disc.
- Make sure that these two discs are tight enough because if they’re not, it could result in Dymo printing blank labels.
- Plus, also ensure that the label is fed from underneath the spool.
- Next, move the label guide to ensure the label stays in position.
Close the top of your printer and try to print again.
3. Check for Any Possible Dymo LabelWriter Software (DLS) Issues
Now that you’ve cleaned the sensor and aligned the labels properly, but still you face this printing issue, it means there’s a compatibility issue with the Dymo LabelWriter firmware. Moreover, this software issue generally arises from any Windows update, specifically the March 2021 update.
Here, you can do two things: either rollback the Windows update or uninstall and reinstall the Dymo software from your computer.
A. Rollback Windows Update
- Press “Windows icon + I” simultaneously on your keyboard to open Settings.
- Scroll down and select Recovery.
- When the Recovery page opens, click on the “Go back” option shown on the right of the Previous version of Windows setting under Recovery options.
- Next, follow the on-screen commands. When you reach the final window, click on the Go back to earlier build option.
The Windows update will be rolled back.
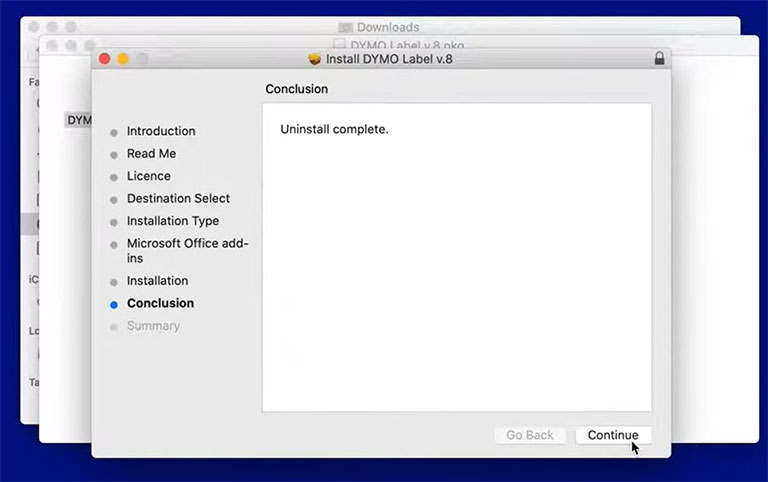
B. Uninstall and Reinstall Dymo Software
First, unplug the USB cord of your printer from your PC.
Now, open the Windows search bar, type “Add or remove programs, ” and press Enter.
Scroll down and look for Dymo. When found, click on the three dots on the right side and select Uninstall.

Restart your PC after uninstalling the Dymo firmware.
Next, download your Dymo model’s driver from their official Drivers and Software Download page.
Make sure to download the previous version of Dymo software, not the current one from which you’re experiencing the printing problem.
Once you download the software, run the program and install it on your PC by following the installation steps.
After that, restart your computer and plug the Dymo USB cord back into your PC. Attempt to print it again!
4. Recheck Your Dymo LabelWriter Printing Settings
If your Dymo prints blank labels after trying all these methods, the most likely cause is the printing settings. You might be using incorrect LabelWriter printing settings within your third-party app or in your Dymo Label Firmware (DLF).
Follow These Steps to Readjust Your Printing Settings:
- Open your Dymo software, create a new label, and select the correct label from the shown list.
- You’ll see a blank label screen. Hover your cursor over the Insert/Designer tab and type any text on the given label.
- Now, try to print that single label.
- If it prints correctly, the issue was with the previous format you were trying to print with. So, to fix this, create a new label template.
However, if you’re using a third-party app to print the labels and if LabelWriter is printing incorrectly, you should try printing the label from your Dymo software.
If it prints correctly from your Dymo software but not from the third-party app, you should contact the third-party application vendor to help fix this problem.
5. Unplug Any Other Devices From the Power Strip
Are you using more than one device on the same power strip? If so, there’s a chance your LabelWriter prints blank labels. It’s because of electromagnetic waves, but don’t worry. The fix is simple. Plug the Dymo printer into an empty power wall outlet.
It sounds unusual, but it works most of the time. Moreover, some owners have also reported that plugging their Dymo printer directly into the electrical outlet has helped them fix this issue.
6. Contact Dymo Customer Support
If you tried all the above troubleshooting steps but your Dymo printing blank labels, it’s time to contact Dymo customer support to resolve the issue.
However, there’s also an option to replace your product in case it stops working. Generally, most Dymo printers come with a limited 2-year warranty that you can claim on their official website.
How to Fix a Label Jam in My Dymo Printer?
Label jams occur as a result of exposed adhesive. If the printer’s adhesive cover is broken, the labels may stick to the printer drive, causing the device to malfunction.
Follow These Steps to Unjam Your Dymo Printer:
- First, unplug the printer from the power outlet or PC.
- Lift the top of the printer and remove the spool.
- If there are any labels logged into the dispenser, remove them.
- You’ll see a small object with “Dymo” written on it. That is the faceplate.
- Pull the faceplate and keep it aside for safekeeping.
- Now, check the left side of your printer. You’ll find a paper release lever. With the help of this lever, separate the print head from the feed.
- Next, take a straightened paper clip to remove the label caught in the printer carefully.
- Use plastic tweezers to dislodge any remaining pieces gently. Make sure you do this carefully without damaging any internal mechanisms of your LabelWriter printer.
- After removing the jammed label successfully, feed the cleaning card through the printer multiple times until clean.
- Now, put the faceplate back onto your LabelWriter and insert the labels and spools back into their original position.
- Plug the printer back in and attempt to print again.
How to Setup Your Dymo Printer?
Setting up a Dymo printer is quite easy.
First, ensure you’ve got all the necessary items in your box. The box must contain the following:
- A LabelWriter printer
- A CD-ROM
- A USB cable
- A roll of Dymo stamp labels
- A cleaning card
Other items in the box include a quick start guide, a roll of Dymo address labels, a power cord, and a power adaptor.
Now, insert the CD-ROM into your PC and install the Dymo LabelWriter software. All you have to do is follow the on-screen instructions.
In the meantime, open the top of your printer and feed the paper into the machine.
Once the software is installed, plug the power cord into the electrical outlet and connect one end of the USB to your PC and the other end to your printer.
That’s all. Start printing!
Best Ways to Maintain Your Dymo Printer
Do the Following to Keep Your Dymo Printer Tip-Top in Shape:
Take the most out of your Dymo cleaning card. The card will help remove the debris from the print head and the plantar. You should use the cleaning card a minimum of once a month. However, the number of times you use the card depends on the frequency with which you use the Dymo printer.
Next, make sure to align the labels properly and ensure that none of the labels is exposed to adhesives. As already mentioned, these adhesives can cause the printer to malfunction. So, Dymo recommends cleaning the printer monthly to avoid gunk building up.
Never use any metal equipment in your printer for cleaning purposes because there are many chances you’ll damage the printer’s print head or some other interior part. Instead, use Q-tips or plastic tweezers. You can also use WD-40 as a degreasing agent.
Finally, ensure that you only use Dymo labels and not third-party brand labels for printing. It’s because you might end up causing damage to your printer by using cheap-quality labels.
Frequently Asked Questions

Why Is Dymo Spitting Out Blank Labels?
A dirty sensor is the most likely cause of your Dymo spitting out blank labels. So, you need to clean the sensor at least once a month for better functioning.
How Do I Fix Label Printing Blank Pages?
Do the following to fix label printing blank pages:
> Clean the printer sensor by using a Dymo cleaning card, and make sure you use it until the sensor gets cleaned.
> Properly align the labels by opening the printer’s top and checking the position of the print head, label roll, and paper lever.
Can a Dymo Run Out of Ink?
No, Dymo uses self-contained tape cartridges instead of ink. If the print starts to fade, it indicates that you need to replace the batteries.
Why Is My Label Printer Printing an Extra Blank Page?
If you recently changed the roll of labels and forgot to change the settings or calibrate the media, the printer will likely print an extra blank page.
How Do You Clean a Dirty Sensor on a Dymo Printer?
First, take your Dymo cleaning card and feed it through the printer as you do a label. The printer will completely feed it through. You must repeat the process 10 times to clean the sensor properly. Next, manually clean the printer using a non-metallic object.
How Do You Reset a Dymo Label Printer?
Simply unplug the Dymo label printer from the power outlet as there’s no on/off switch on it. You’ll have to wait for a few seconds till the blue light disappears. Now, plug it again into the power outlet and try to print again.
The Bottom Line
If your Dymo printing blank labels, don’t worry, just follow these proven fixes to solve this issue.
- Properly clean the sensor of your printer
- Check the alignment of the labels
- Check for any possible Dymo LabelWriter Software (DLS) issues
- Recheck your Dymo LabelWriter printing settings
- Unplug any additional device from the power strip
- Contact Dymo Customer Support
Hopefully, one of these fixes has worked for you. Were you able to fix your Dymo printer? Let me know which fix worked for you in the comments below!


Leave a comment
Have something to say about this article? Add your comment and start the discussion.