How to Install WordPress
First, you have to install WordPress. We explain the process here in easy steps. Control Panel design changes from time to time, though the images below will not change much.
1. Go to the Bluehost control panel (cPanel).
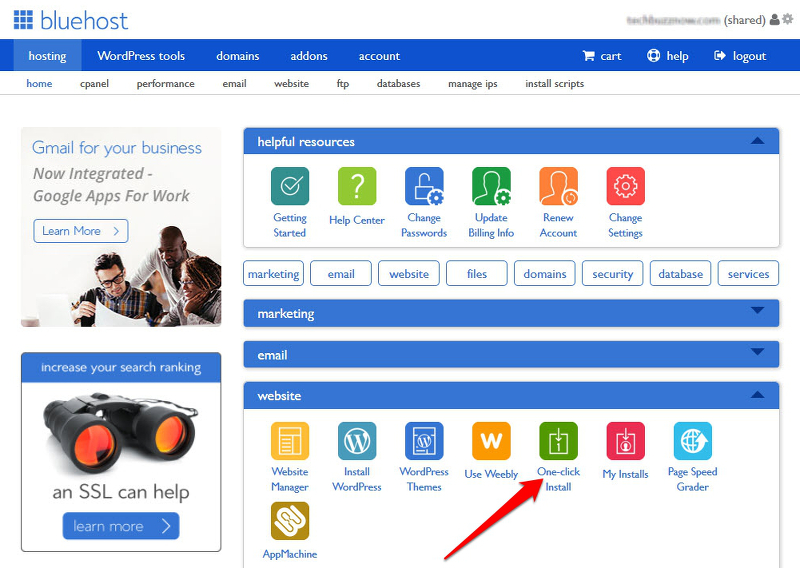
2. Scroll down to find ‘One Click Install’ (arrowed above). Click on the image and select the WordPress option from the list provided:
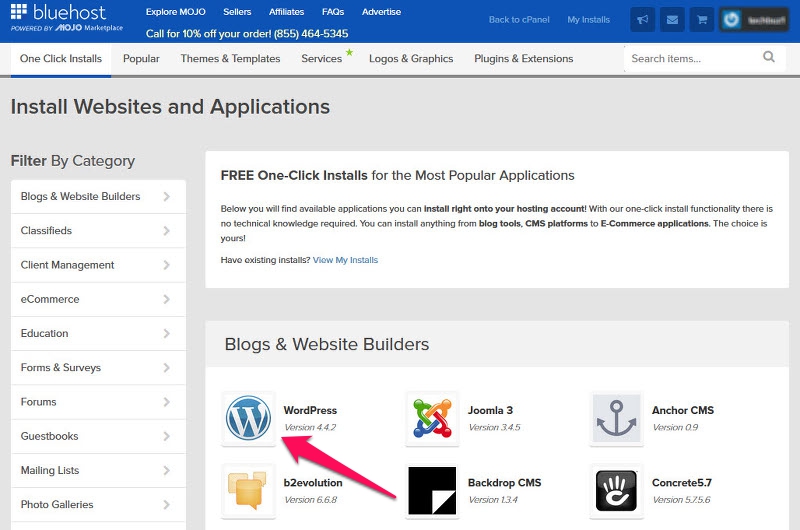
3. Click on the ‘W’ image and you will find the screen below:Use the drop-down box arrowed to select the domain where you will install WordPress. Click on ‘Check Domain.’ Click on the ‘Show Advanced Options’ box that appears and you can then enter the title of your blog, a username and password. This enables you to access the blog as administrator:
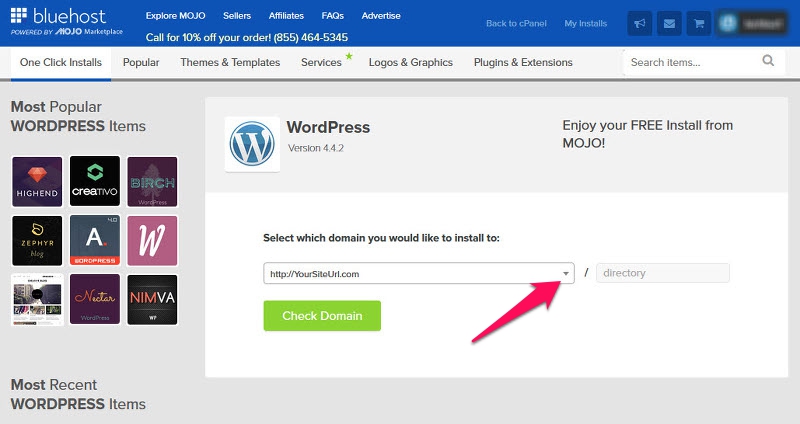
4. Use the drop-down box arrowed to select the domain where you will install WordPress. Click on ‘Check Domain.’ Click on the ‘Show Advanced Options’ box that appears and you can then enter the title of your blog, a username and password. This enables you to access the blog as administrator:
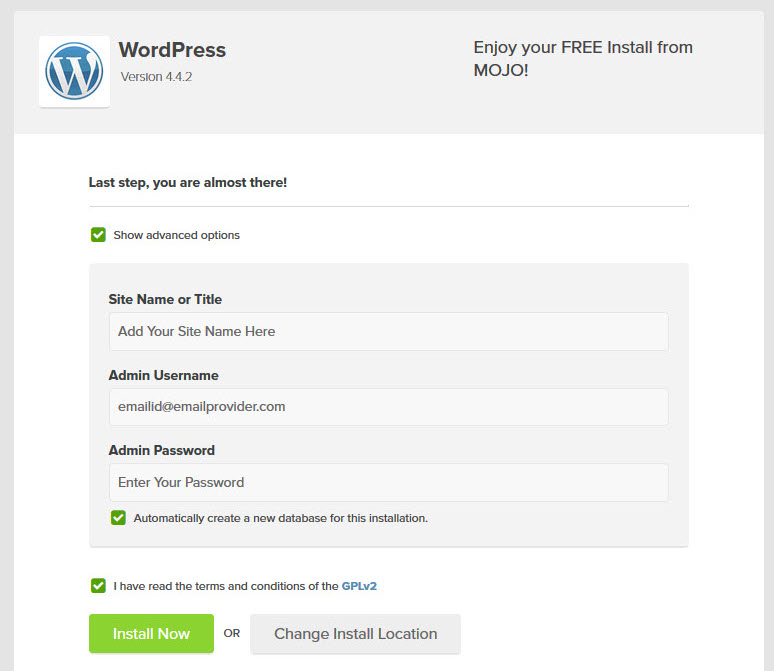
Make sure you keep a note of your login details then click ‘Install Now’ and that’s you done. You should be emailed your user name and password.
You can log into your site using the URL yoursitename.com/wp-admin/ or the URL emailed to you by WordPress. Enter your username and password and you will reach your Admin Page:
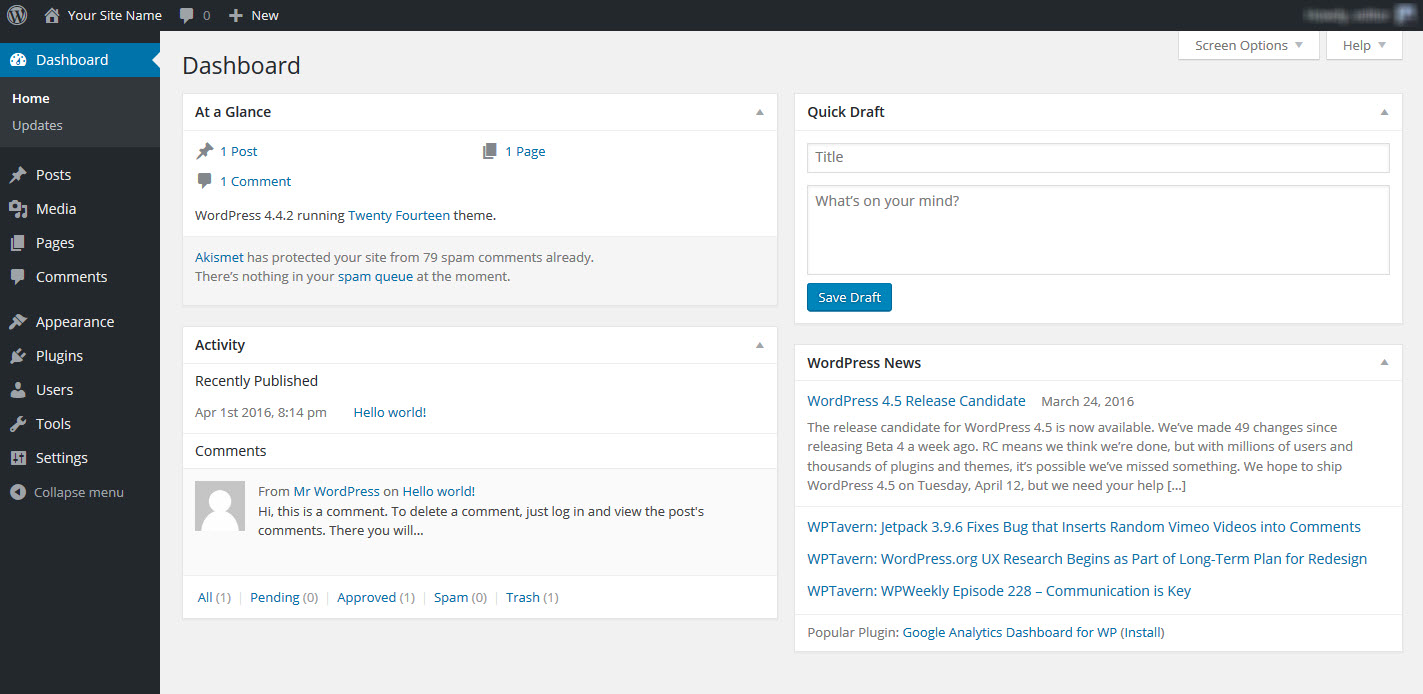
This is the first page you see when you access a new WordPress site. From here, you will customize your blog and get it looking how you want it. The black dashboard to the left contains all the tools you will need to achieve this.


Leave a comment
Have something to say about this article? Add your comment and start the discussion.