What kind of avid gamers wouldn’t want to keep their mind-blowing moments, especially when they have just made a perfect boss kill in Elden Ring or scored a win in Warzone? It is easy to take screenshots on PS4, but recording games on PS4 for YouTube can be a little tricky. But it is not as complicated as you might think.
In this post, we will walk you through how to record PS4 gameplay for YouTube, with voice, with the webcam, with no time limits, and even on a low-end PC.
Record Gameplay on PS4 With a Capture Card
Sure enough, you can record PS4 gameplay directly on your consoles without extra hardware, but that comes with some limitations. We will cover that in the next part. If you want to record PS4 gameplay like a pro, using a capture card and a screen recorder is the best choice. This way, you can save the clutch gaming moments with higher definition and frame rate, add sound or facecam, and edit the recording clip more than just trimming.

To do this, you will need a capture card, a PC, two HDMI cables, a USB cable, and of course, your PS4. For capture cards, Elgato and AVerMedia are reliable choices. For the screen recorder, VideoProc Converter can be one of the best for beginners.
Don’t get me wrong. VideoProc Converter, as the name implies, is indeed a video converter. It comes with a built-in simple yet powerful screen recorder. And the screen recorder works like a charm with three recording modes: screen, webcam, and PiP mode for both screen and webcam. The layout is simple and intuitive, making everyone, even novice users start recording like a pro without any learning curve.
Recording on a low-end PC can be compute-intensive, which may eventually cause lagging or even crashing. But VideoProc Converter peaks the level-3 hardware acceleration to ensure a minimum CPU usage of only 2%. Thus, you can see a dramatic decrease in source utilization and then yield a hassle-free experience and a better result on the recordings.
VideoProc Converter offers 29 quick-edit tools, including trimming, merging, adjusting volume, adding timecode, transitions, and effects, etc. You can also get through your clips 16x faster or slower to highlight the sheesh moments. From booting to uploading, you don’t even need other video editing software anymore.
How to Record PS4 Gameplay for YouTube on PC with VideoProc Converter
Step 1. Connect PlayStation 4, capture card, and your PC.
First, connect your PS4 to the capture card through an HDMI cable. Then, connect the capture card to your monitor with another HDMI cable. After that, connect the capture card to your PC via a USB cable. Thus you can see your PS4 home screen on your monitor.
Step 2. Set the recording format, audio source, recording area, etc.
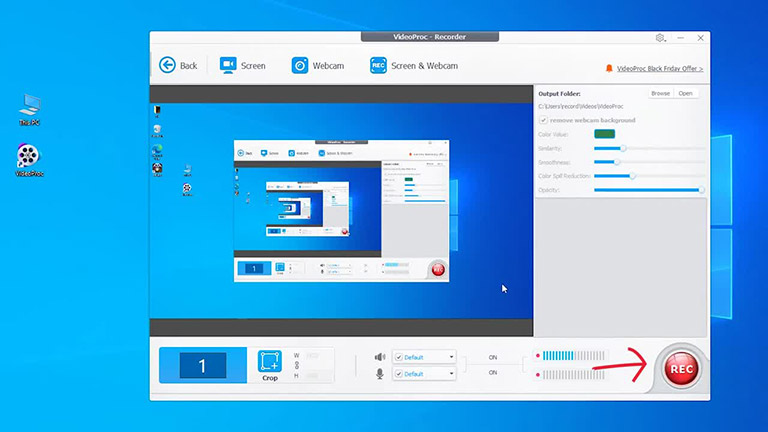
Download and install VideoProc Converter from its official website. After installing, launch it. Go to the Recorder menu from the home screen. Choose a recording mode among “Screen”, “Webcam”, or “Screen & Webcam”.

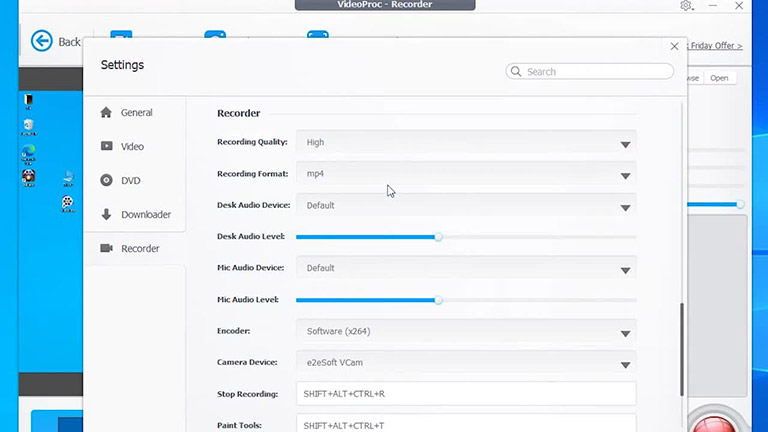
The default recording format of VideoProc Converter is MP4, but you can change it in Settings > Recorder > Recording Format. VideoProc Converter now supports MP4, MKV, MOV, FLV, and TS as the recording format.
Step 3. Start recording and saving the clips.

Click the REC button to start recording. To stop recording, click STOP. Your recordings are listed on the right side of the interface. You can find your recordings in the output folder by clicking the folder icon.
Step 4. Edit and output the final recordings.
Go to the Video menu from the home screen and click the +Video button to load your recording. Head to Target Format > YouTube Video, then select MP4.
Click the gear icon named Option, then go to the Edit Video tab, where you can trim the footage, add effects, adjust audio volume and playback speed, etc. When you are happy with your video, click Done to save the edits. Then you can click RUN to output your gaming video at high speed with GPU acceleration.
Record Gameplay on PS4 Without Capture Card
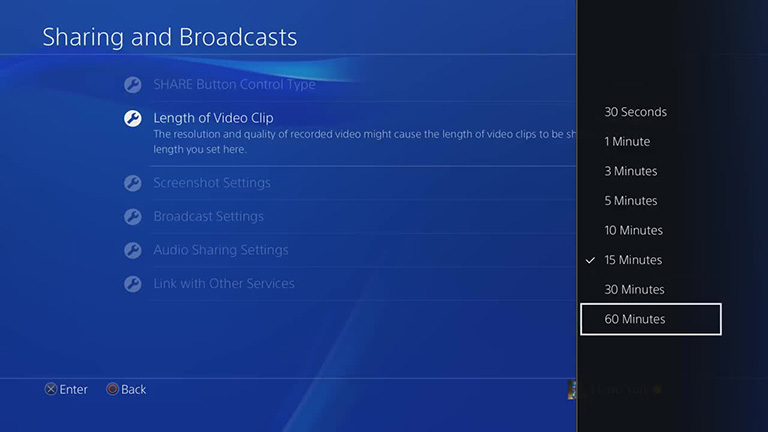
Your PS4 has a Share feature for you to record gaming videos and share them with your friends. This feature lets you capture and share your gaming video directly from the PS4 console. You can record videos for up to 60 minutes by changing the sharing settings. And the PS4 will always save the most recent 15 minutes of gameplay.
How to Capture Video Clips on Your PS4
Step 1. Change the PS4 SHARE button settings.

Go to Settings > Sharing and Broadcasts > Length of Video Clip. The maximum length of recordings is 60 minutes. And you can record gameplay as short as 30 seconds.
Step 2. Start recording and play as usual.
Press the Share button twice to start recording. Your PS4 will record the length of the video you set. Double-press the Share button again to stop recording.
Step 3. Save the recording.
Press the Share button, and then select Save Video Clip. You will see the recordings in the Capture Gallery of your PS4.
Step 4. Trim and share your gaming video.
Go to the Capture Gallery from the home screen of your PS4. Select the recording and click the Options button on your controller to access the Trim feature.
Wrap Up
So that’s all for how to record PS4 gameplay for YouTube. In the long run, if you really want to capture and share your gaming videos on YouTube, using a capture card with a decent video recorder like VideoProc Converter could be the best choice. Simple yet powerful, you can easily record your gameplay and show it off with your friends. That would be a great start.


John
Nice article but I don’t understand that “Capture Card” part. Do I need to purchase a physical card for that? Please clarify.
Tushar Thakur
Yes, you need to have that hardware.
Mounts
Is there a way to do this without the capture card?